
WordPress error logs are saved in a file called debug.log inside the /wp-content/ folder once debug mode is on. Turn debug mode on with a plugin or by adding WP_DEBUG and WP_DEBUG_LOG to wp-config.php, then open the file over SFTP or your host’s file manager.
Error logs provide detailed insights into a WordPress site’s functionality, performance, or security issues. Knowing how to find and access WordPress error logs helps you identify and resolve problems quickly, ensuring a smooth experience for your site visitors.
WordPress Error Logs (TOC)
- What are WordPress Error Logs?
- How to Enable WordPress Error Logs
- How to Find and Access WordPress Error Logs (Step-by-Step)
- Fixing Issues Found in WordPress Error Logs
- Best Practices to Manage WordPress Error Logs
- How to Disable the WordPress Debug Mode
- WordPress Error Logs FAQs
- Final Thoughts: WordPress Error Logs
Here are the two ways to turn on WordPress error logs.
| Method | How It Works | Best For |
|---|---|---|
| Plugin (WP Debugging) | Install and activate the plugin; it turns on debug logging for you | Beginners who prefer not to edit files |
| Code (wp-config.php) | Set WP_DEBUG and WP_DEBUG_LOG to true in wp-config.php | Developers with SFTP or file manager access |
| Where logs are saved | /wp-content/debug.log for both methods | Download or open the file to read errors |
What are WordPress Error Logs?
WordPress error logs record errors, warnings, and notices, usually generated by WordPress, plugins, themes, or server issues.
You can use these logs to understand and troubleshoot the underlying problems on your site.
They help you identify why your site might be experiencing difficulties, displaying error messages, or not functioning as expected.
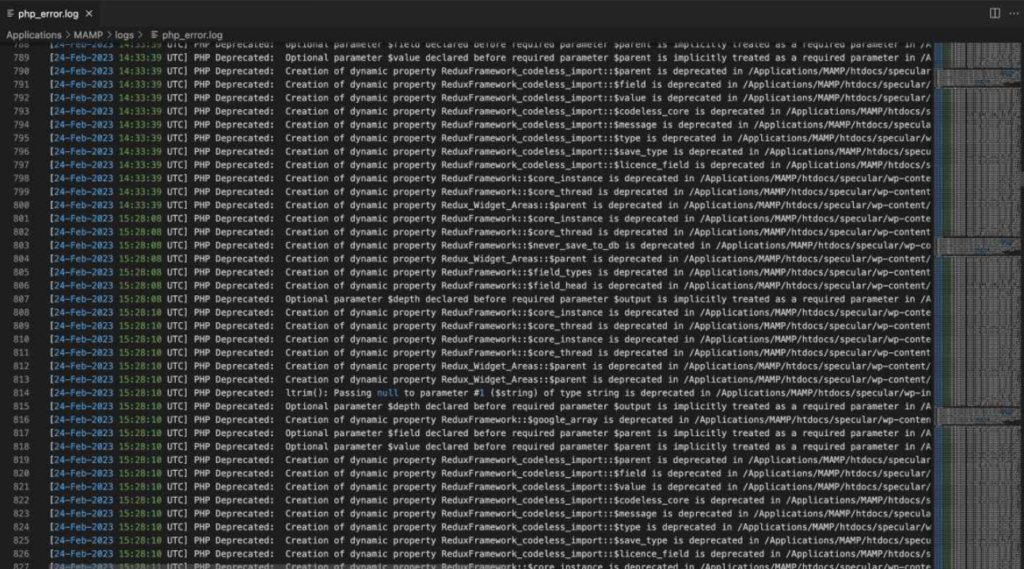
This is what WordPress error logs look like:
Why are WordPress Logs Important for Troubleshooting?
Here’s why these logs are important for troubleshooting and fixing problems:
- Detailed Insight into Errors: WordPress error logs help you identify the exact underlying problem on your site, such as a syntax error or database connection issue.
- Real-Time Monitoring of Issues: These logs record issues as they happen. For example, if a new error appears after a recent plugin update, the logs can point directly to the cause.
- Debugging Custom Code: You can use these logs to determine if custom code snippets are causing issues. They can pinpoint errors in the code without requiring manual debugging.
- Minimizing Site Downtime: Quick identification and resolution of errors prevent prolonged site downtime, ensuring visitors have a positive experience.
- Performance Optimization: Resolving logged errors can reduce server load, since some errors put extra strain on the server.
How to Enable WordPress Error Logs
Method 1. Enabling WordPress Debug Mode with a Plugin
WordPress offers a built-in feature to log errors. By default, this feature isn’t enabled. You need to enable it first.
For this purpose, you’ll need to add the WP_DEBUG constant in your wp-config file. After this, WordPress will enable the debugging mechanism and generate a debug.log file in {your website}/wp-content/.
The easiest way is to install a WordPress debugging plugin like WP Debugging.
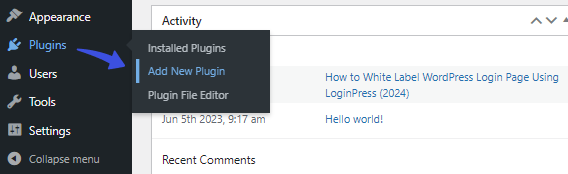
To install and activate the WP Debugging plugin on your site, go to the left sidebar of the WordPress admin dashboard, navigate to Plugins, and click the Add New Plugin option.
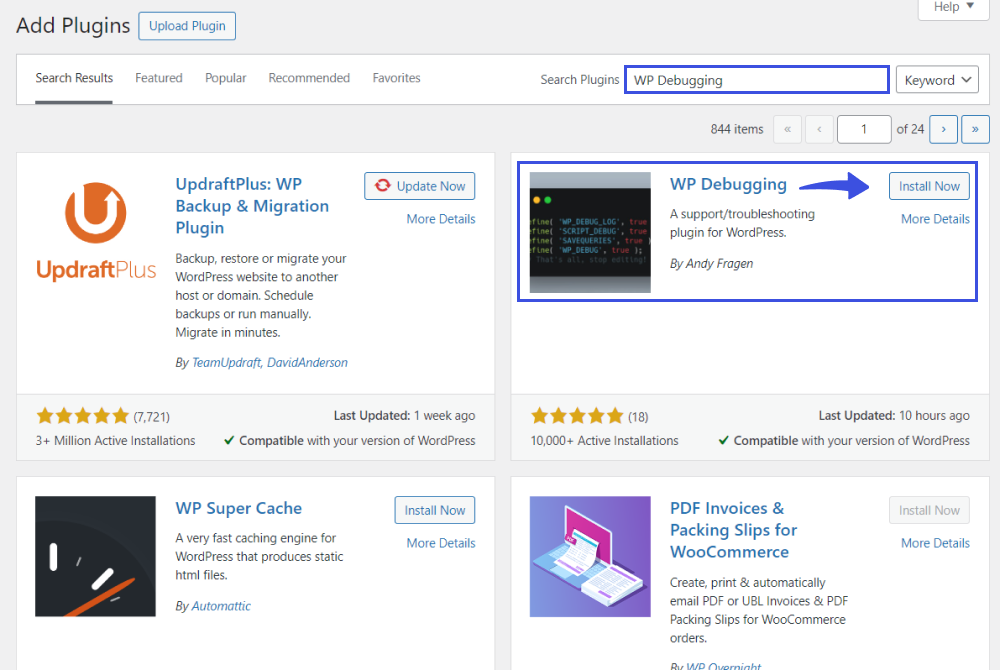
On the next screen, search for the plugin using the search box, find the plugin in the search result, click Install Now, and then Activate the plugin.
Once activated, the plugin will automatically enable the WordPress debug mode. It will then log error messages on your site.
Every time you want to see the error logs, go to the left sidebar of the WordPress admin dashboard, navigate to Tools, and click the WP Debugging option.
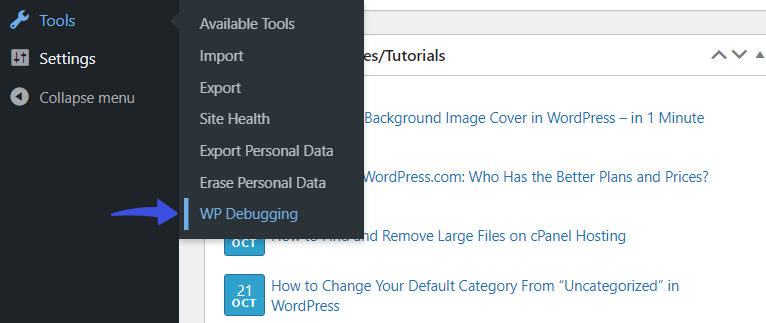
On the next screen, you can see details about any underlying problem. Use them to find the root cause and fix it quickly.
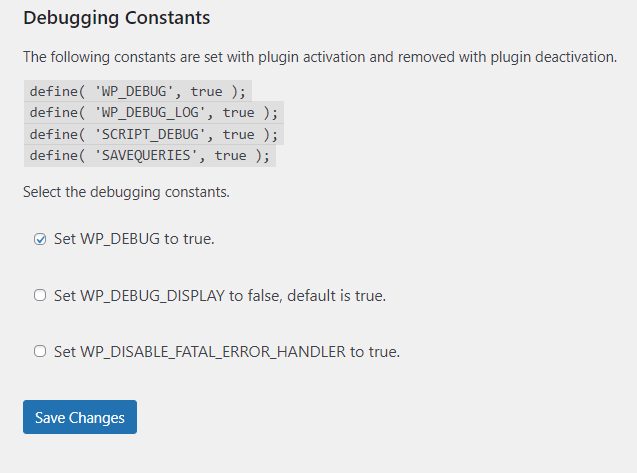
Method 2. Enabling WordPress Debug Mode with Code
You can also enable WordPress debug mode with code.
Note: This method is best for advanced users with good coding skills. Any mistake in the code can lead to severe problems for your site.
To use this method, you’ll have to edit your wp-config.php file using an FTP client.
Note: You can also use the file manager option in the cPanel of your WordPress hosting control panel.
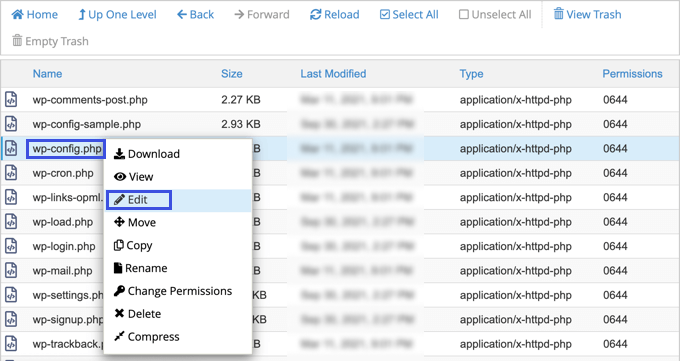
After opening the file, search for the text that says, ‘That’s all, stop editing! Happy blogging.’
Add the following code before this line:
define( 'WP_DEBUG', true );

define( 'WP_DEBUG_LOG', true );
All done!
How to Find and Access WordPress Error Logs (Step-by-Step)
Find WordPress error logs in /wp-content/debug.log: connect with SFTP or your host’s file manager, open /wp-content/, and download debug.log.
To see this file, connect to your WordPress site using an SFTP/FTP client, such as FileZilla, or the file manager option in your WordPress hosting control panel.
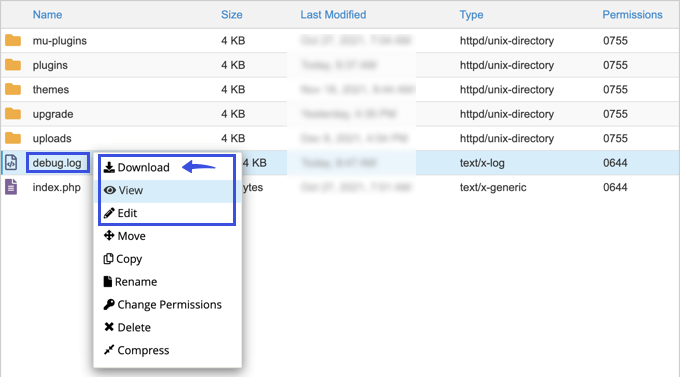
After connecting your site, simply go to the /wp-content/ folder. Here, you can see the debug.log file, where you’ll find all the WordPress error messages, warnings, and notices that have been logged.
Right-click the file and choose the Download option.
The file shows details for every error message, including the date and time it occurred.
This is what the debug.log details look like:
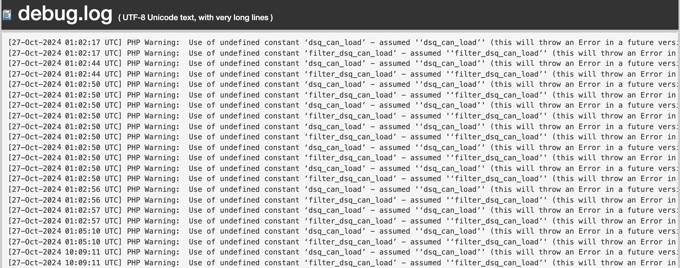
Use this information to find a solution to the underlying problems your WordPress site is encountering.
Fixing Issues Found in WordPress Error Logs
Fix issues in WordPress error logs by finding the error line, reading its message and file path, then fixing the plugin, theme or code it points to.
Follow these steps to work smoothly with the debug.log file:
- Find out the error/warning in the debug log
- Note the error code associated with the entry
- Understand the meaning of the error code
- Find a solution to fix that error
Every entry within the debug.log file contains the date (in UTC, not your local time), module, process ID, and visitor’s IP address.
The error message itself is the most important piece of information here. For instance, you might see an error like “File not found,” which indicates a missing file and specifies its path.
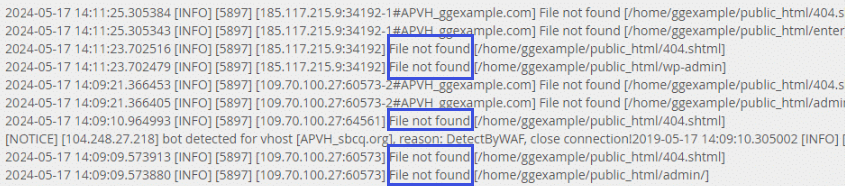
After understanding the cause of the error, you can easily fix it yourself.
If you still can’t find the solution, visit the official WordPress forums or contact the support team of your WordPress hosting company.
Best Practices to Manage WordPress Error Logs
Manage WordPress error logs by logging only while troubleshooting, checking logs after updates, using a log viewer plugin and blocking public access to log files:
- Enable Logging Only When Necessary: You should enable logging only during troubleshooting. Continuous logging can impact site performance and lead to large log files.
- Schedule Routine Checks: Review your logs periodically, especially after site updates, to spot issues early.
- Use Log Management Plugins: You should use tools like Error Log Monitor or WP Debugging to make viewing, managing, and filtering logs directly from the WordPress admin dashboard easier.
- Restrict File Access: If the log files are stored on your server, restricting file access is also a good practice. This ensures that only authorized users can view sensitive information.
- Delete Old Logs: You should perform a monthly cleanup to delete outdated logs and free up server space.
Following these best practices allows you to monitor and resolve issues proactively.
How to Disable the WordPress Debug Mode
Disable WordPress debug mode once the problem is fixed, by deactivating the debugging plugin or setting WP_DEBUG to false in wp-config.php. Leaving it on can slow your site and create WordPress security risks.
If you enabled the WordPress error logs using the plugin, go to the left sidebar of the WordPress admin dashboard, navigate to Plugins, and click the Installed Plugins option.
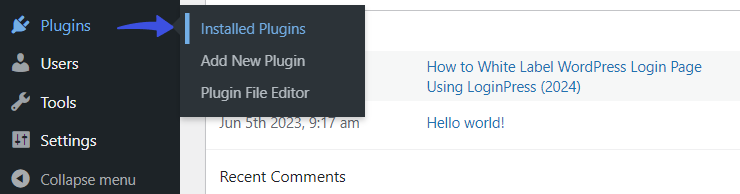
On the next screen, deactivate the WP Debugging plugin.
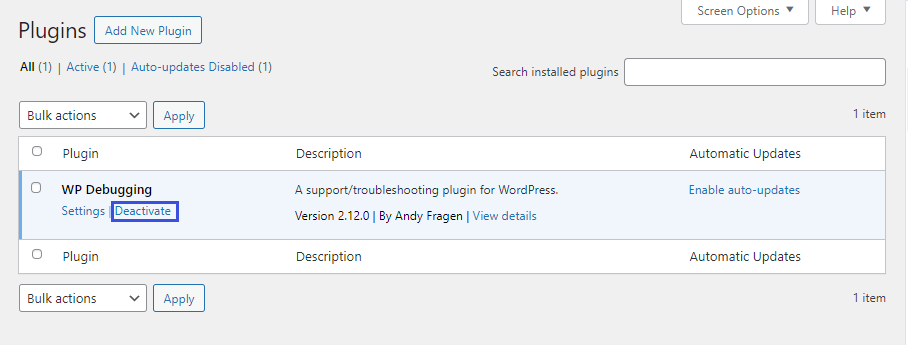
If you enabled debug mode with code, edit your wp-config.php file using an FTP client.
After opening the file, search for the text that says:
define( 'WP_DEBUG', true );

define( 'WP_DEBUG_LOG', true );
Simply change the WP_DEBUG and WP_DEBUG_LOG lines of code to ‘false.’
All done!
WordPress Error Logs FAQs
WordPress error logs provide information about errors, warnings, etc., often resulting from WordPress themes or plugins. They mainly help you identify why the site is experiencing performance issues. After knowing the problem, you can quickly resolve it.
To view error logs in WordPress, you must access your file manager in the hosting panel or through FTP, go to the File Manager, and open the /wp-content/ folder. Next, you must search for the debug. log file. In this folder, you’ll find WordPress errors, warnings, notices., etc., that were logged.
Yes, you can safely delete debug.log after troubleshooting. You can leave it if you expect further issues or want to keep an error history.
Notices can be categorized as minor issues in the code. On the other hand, warnings are more significant issues that indicate a potential problem. Lastly, fatal errors are serious issues that prevent a script from running.
Final Thoughts: WordPress Error Logs
This guide covered easy ways to find and access WordPress error logs. Reviewing these logs helps you diagnose issues and improve site security and performance, resulting in a far better experience for all visitors. My guide to speeding up WordPress covers the next steps.
That’s all for this article!
Leave a Reply