
To clone a WordPress site, use a plugin like Duplicator to package the site and run its installer on the new location, or copy the files over FTP and export and import the database by hand. The plugin method takes about six steps; the manual method takes seven.
Developers, designers, and site owners clone WordPress sites to test updates, migrate to a new host, or create backups.
How to Clone a WordPress Site (TOC):
- What is WordPress Site Cloning?
- What are the Main Reasons for Cloning a WordPress Site?
- 3 Requirements to Clone a WordPress Site
- How to Clone A WordPress Site with Duplicator
- How to Clone A WordPress Site Manually
- What’s Next After Cloning Your WordPress Site?
- Which WordPress Cloning Method is Best for You?
- WordPress Cloning FAQs
- Clone a WordPress Site: Final Words
Here is how the two WordPress cloning methods compare.
| Plugin (Duplicator) | Manual (FTP and database) | |
|---|---|---|
| Steps | 6 | 7 |
| Skill needed | Beginner | Technical |
| Tools | Duplicator plugin | FTP client and phpMyAdmin |
| Risk of errors | Lower | Higher |
| Best for | Most site owners | Developers who want full control |
What is WordPress Site Cloning?
WordPress site cloning is creating an exact copy of an existing WordPress site. This process involves replicating all the existing data, including:
- Files
- Databases
- Themes
- Plugins
- Configurations
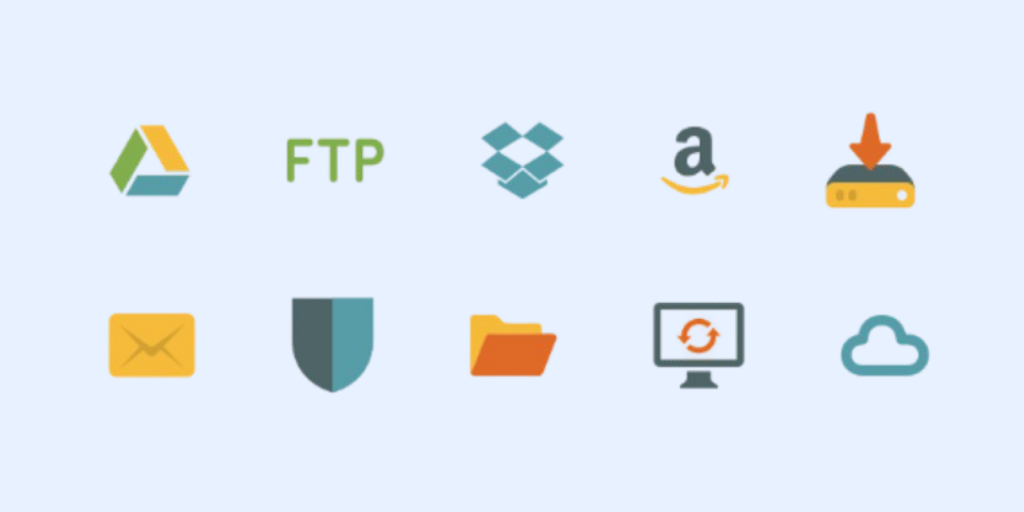
The copy of the WordPress site can be stored on third-party platforms, such as Dropbox, Google Drive, FTP, and more.
See the image below:
Cloning a WordPress site is important for protecting it against accidental data loss. It helps you quickly undo a change or a human error.
What are the Main Reasons for Cloning a WordPress Site?
The main reasons to clone a WordPress site are backups, safe testing, migration, redesigns and troubleshooting:
- Backup and Recovery: Cloning helps you keep a copy of the site. You can use this copy to restore your site to any previous state if needed.
- Testing and Development: Cloning gives you the opportunity to test new plugins, themes, and updates without affecting the live site.
- Website Migration: Cloning makes it simpler to change the site’s domain name without data loss.
- Redesign and Revamp: You can quickly test design variations to see which performs better for your site.
- Troubleshooting: Cloning lets you troubleshoot issues without affecting the live site.
Cloning a WordPress site lets you change, test, and migrate your site securely. It also minimizes risk and downtime.
3 Requirements to Clone a WordPress Site
1. A Backup
There are multiple risks involved in cloning a WordPress site, such as:
- Loss of Data
- Downtime
- Configuration issues due to server differences.
To avoid any mishaps, you must create a backup of your site that includes all core files, databases, themes, and plugins.
For this, you need a WordPress backup plugin like UpdraftPlus.
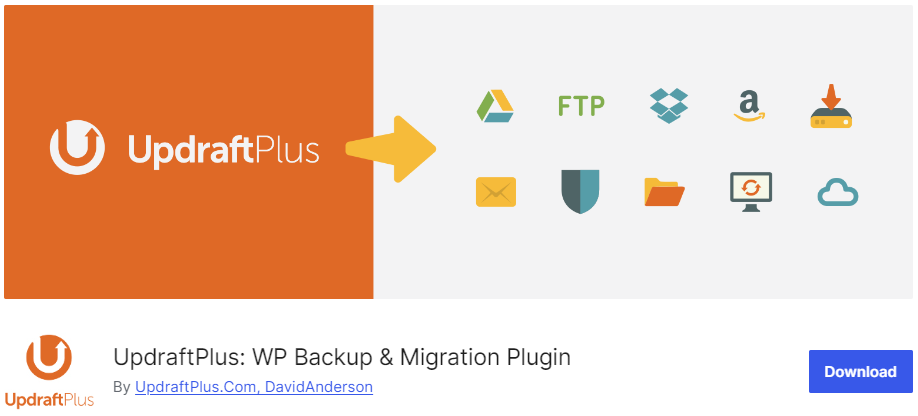
With this plugin, you can back up your database, uploads, plugins, themes, etc., with just a few clicks. However, you have to do it manually.
UpdraftPlus can save backups to secure remote locations, including Dropbox, Google Drive, Amazon S3, and more.
2. Access to the site you want to clone
If you want to clone a WordPress site, you must have access to the back end.
Before you start, ensure you have the WordPress site’s login credentials, i.e., Username or Email Address and Password, to access the admin dashboard.
If you’re not the administrator of the WordPress site, you’ll need all the necessary permissions to make changes to the site.
3. Access to the Server
You also require complete control over the destination server where you will set up your cloned WordPress site.
This access lets you create a copy of your current server with all its applications. The cloned server will have a different IP address, which keeps it isolated from the current server.
How to Clone A WordPress Site with Duplicator
Clone a WordPress site with Duplicator in six steps: install the plugin, create a package, download the files, upload them, create a database and run the installer.
Multiple WordPress cloning plugins, such as Duplicator, are available for free in the WordPress plugins repository. These plugins help you clone a site quickly.
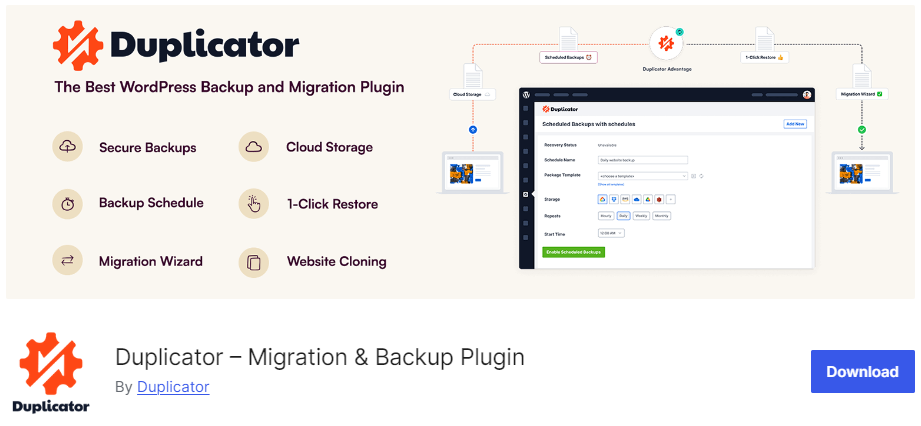
Duplicator is one of the best WordPress migration plugins. It lets you clone a website, create backups, and migrate a WordPress site from one host to another.
Here is how to clone your site with Duplicator.
Step 1. Install and Activate Duplicator
First, install and activate the Duplicator plugin on your WordPress site.
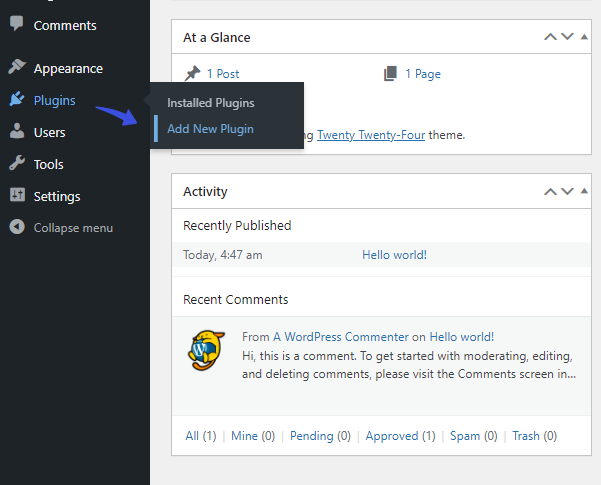
To do this, go to the left sidebar of the WordPress admin dashboard, navigate to Plugins, and click the Add New Plugin option.
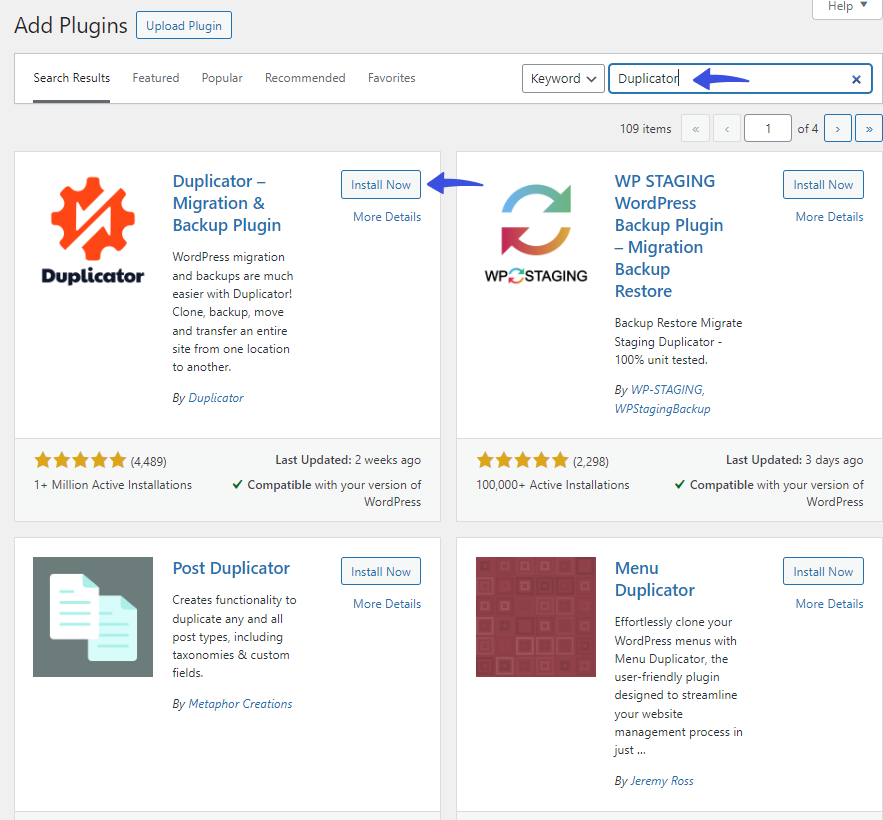
On the next screen, search for the plugin in the search bar, find the plugin in the results, click the Install Now button, and then the Activate button.
Step 2. Create a Duplicator Package
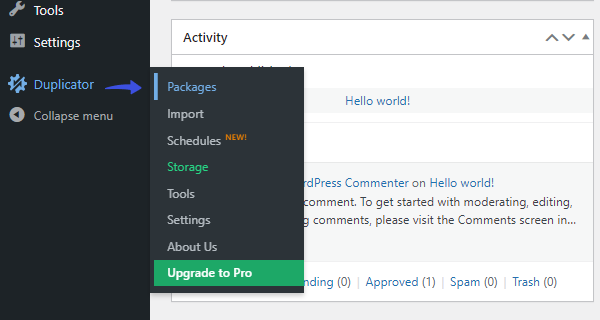
Next, navigate to the Duplicator option from the left sidebar menu and select the Packages option.
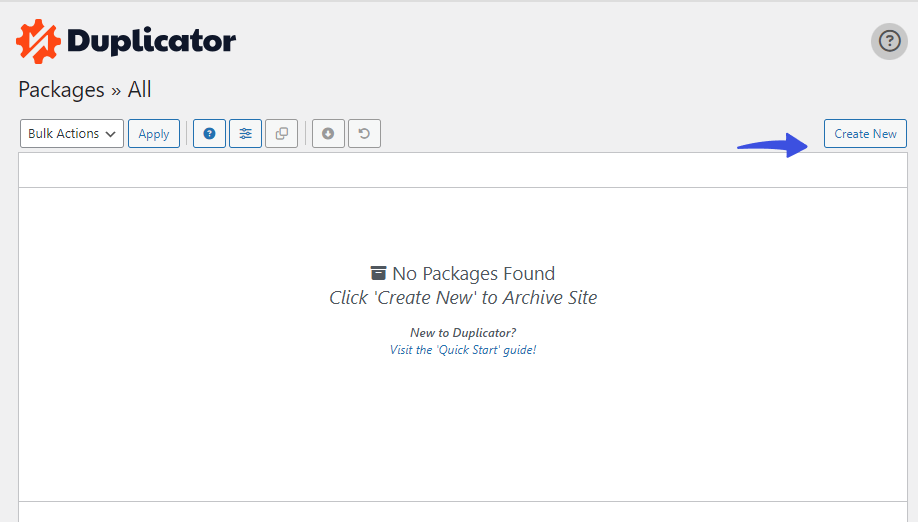
On the next screen, click the Create New button.
Now, add a Name for your clone site and click the Next button.
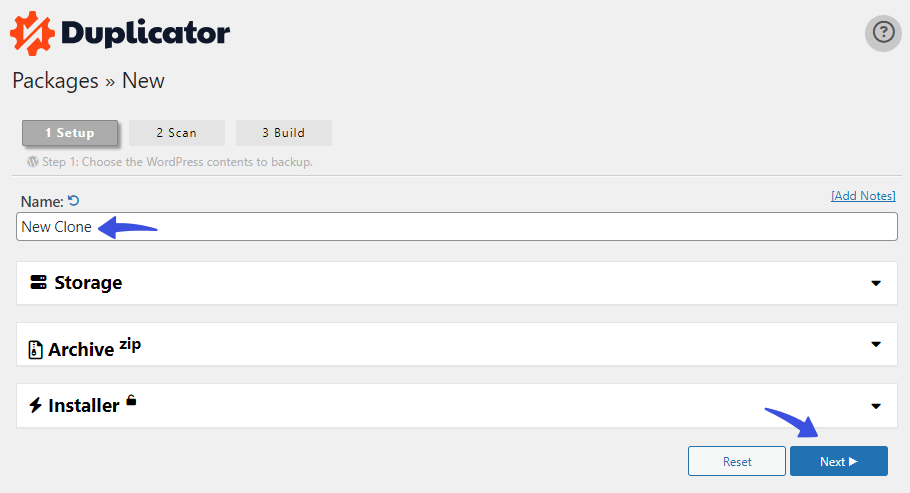
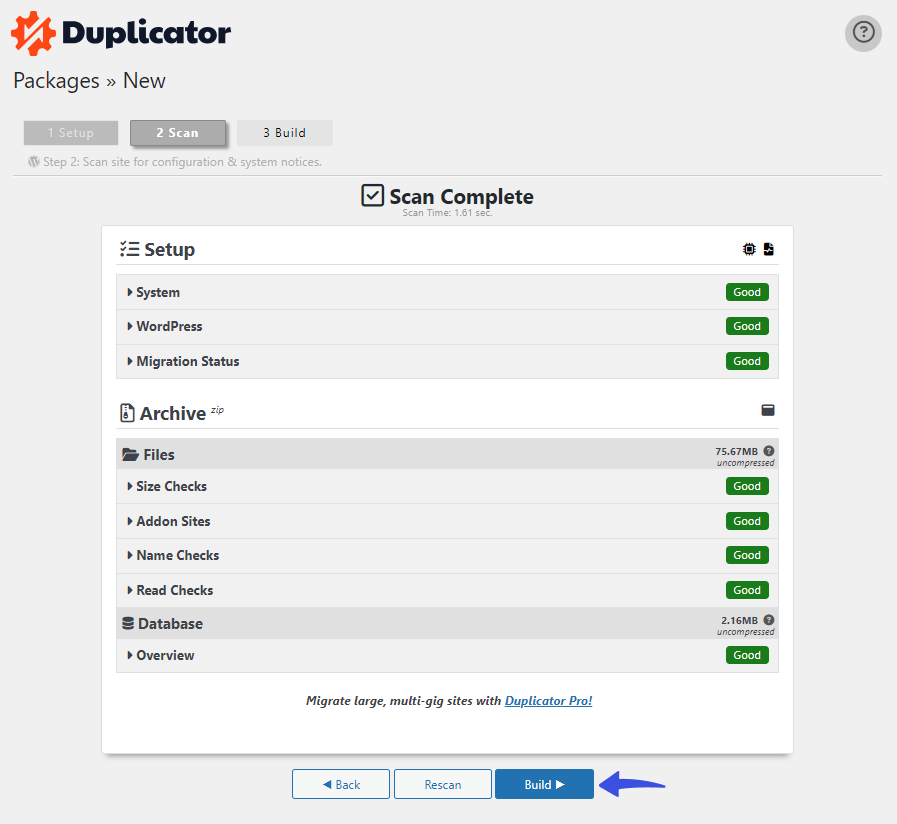
Duplicator will automatically scan your site for configuration and system notices.
When done, click the Build button.
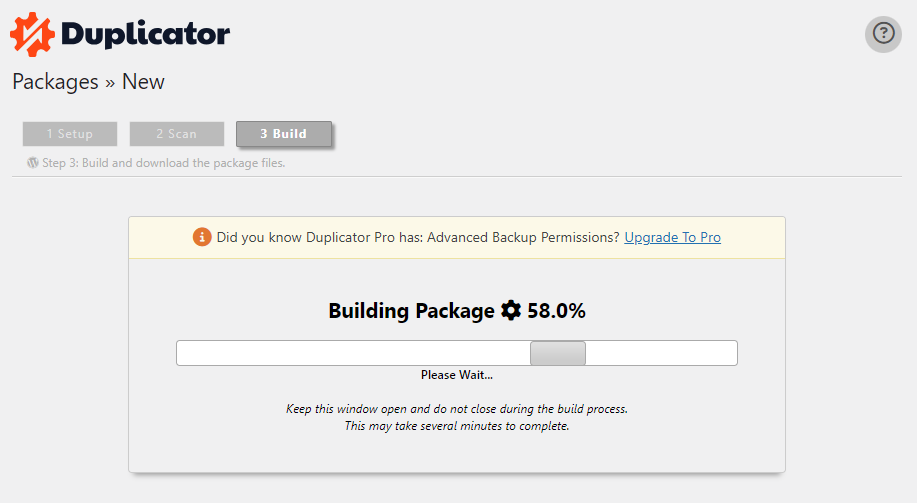
Wait a few minutes while the package builds.
Step 3. Download Installer and Archive Files
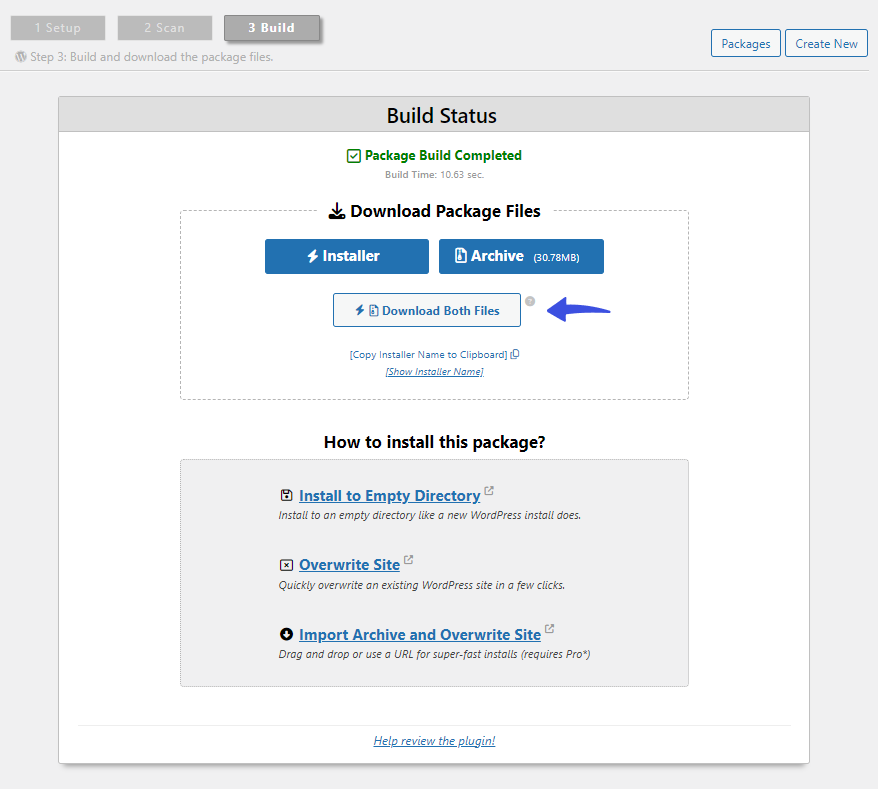
Next, you’ll need to download the Installer and Archive files.
- Installer: This file helps unpack the archive.
- Archive: This file contains a backup of your site.
Step 4. Upload Downloaded Files to New Location
Now, you must upload the downloaded files to the new location. The new location depends on where you are moving your site, e.g., a hosting server or a local server.
If you are using MAMP as your local server, your new location will be inside the ‘/Applications/MAMP/htdocs/’ folder.
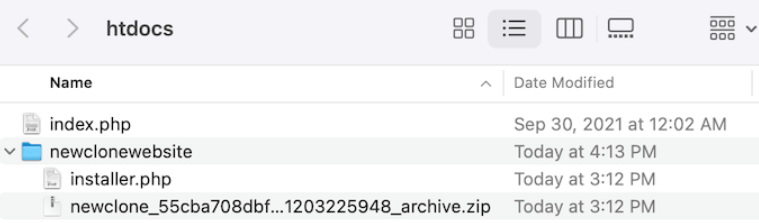
If you’re planning to clone the site on any WordPress hosting platform, you’ll need to create an empty site first. Afterward, you can upload the cloned files to it via the provider’s file manager.
Note: Here, we’ll show you how to upload cloned files to the Bluehost hosting provider.
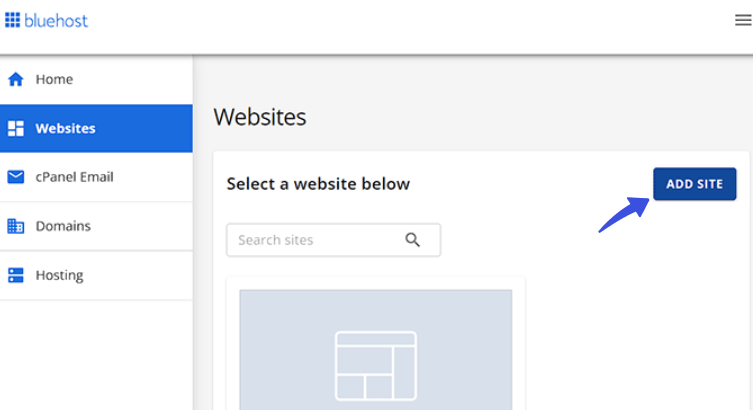
To do this, log into your Bluehost account. Then, go to the left sidebar menu, navigate to Websites, and click the Add Site option.
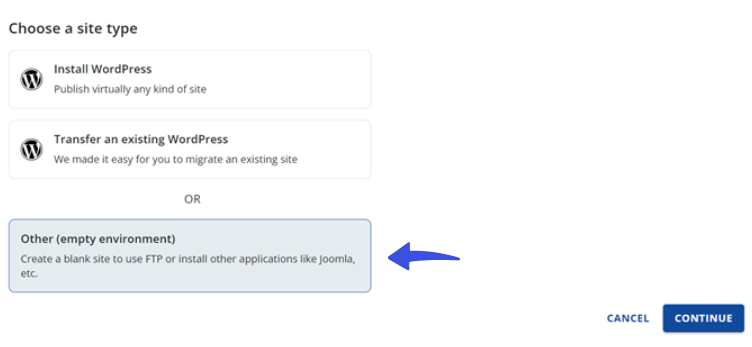
Next, select the Other (empty environment) option and click the Continue button.
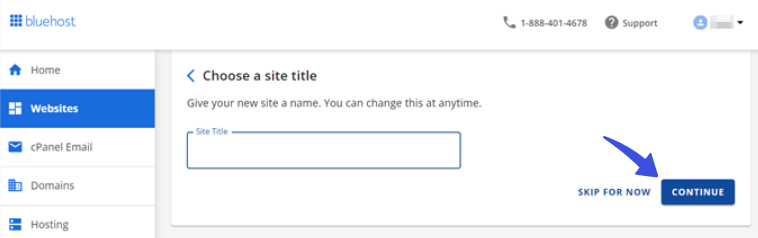
Now, choose a site title and click the Continue button.
On the next screen, you can either connect your site with a domain name or use a temporary domain.
After selection, click the Continue button.
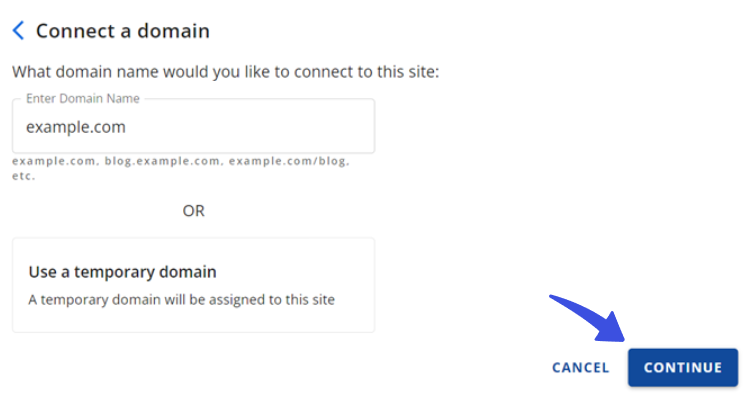
Your empty site is ready!
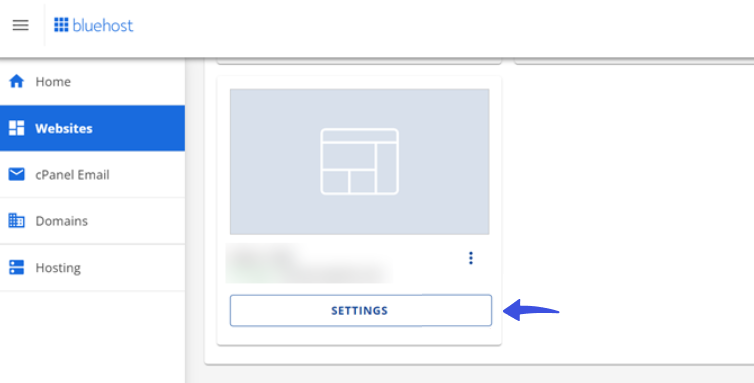
Now, get back to the dashboard and click the Websites option.
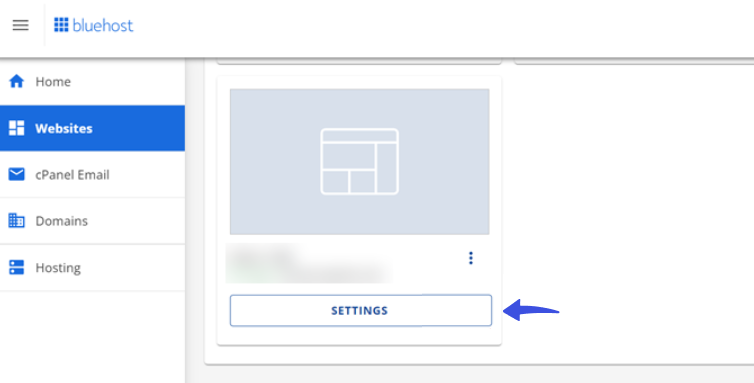
On the next screen, you can see your newly created site. Simply click the Settings button.
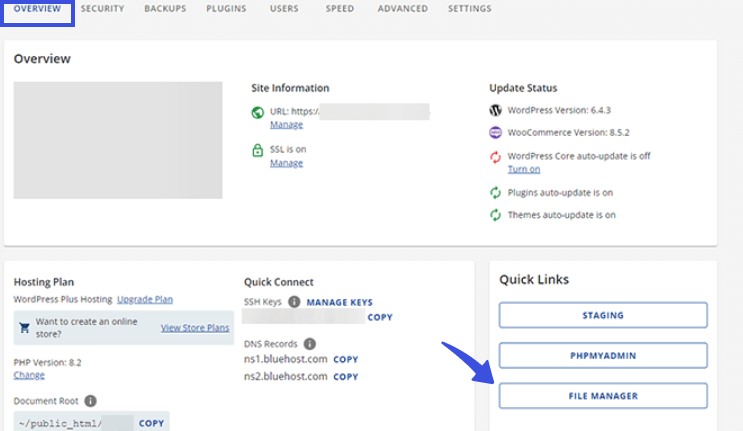
On the overview screen, click the File Manager button under the Quick Links section.
On the File Manager screen, click the Upload button.
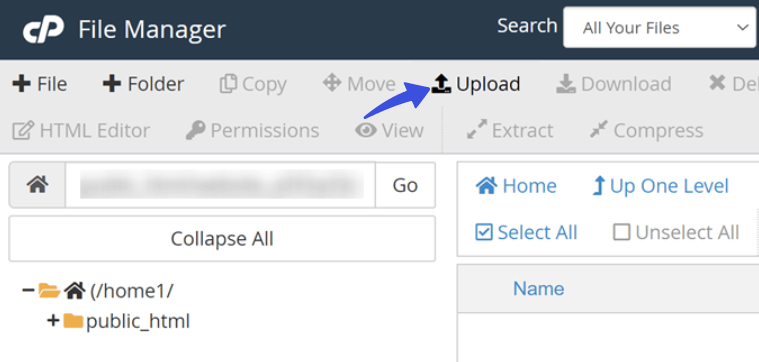
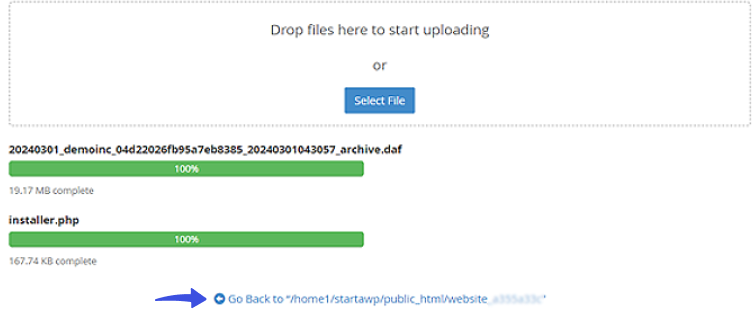
Next, upload the downloaded files to the newly created empty site. When you’re done, click the Go Back to … link.
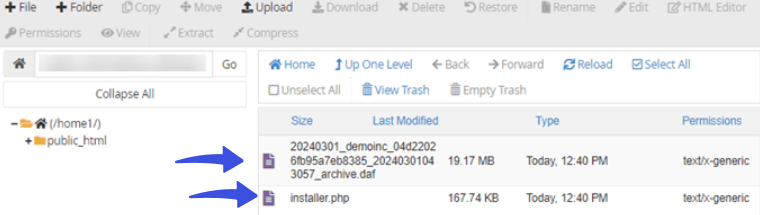
Now, you can see Archive and Installer files inside the file manager.
Note: Remove any other files inside this directory to ensure a smooth installation.
Step 5: Create a New WordPress Database
Now, you’re ready to create a new WordPress database for your cloned WordPress site.
For this purpose, go back to your empty site’s Settings tab like before.
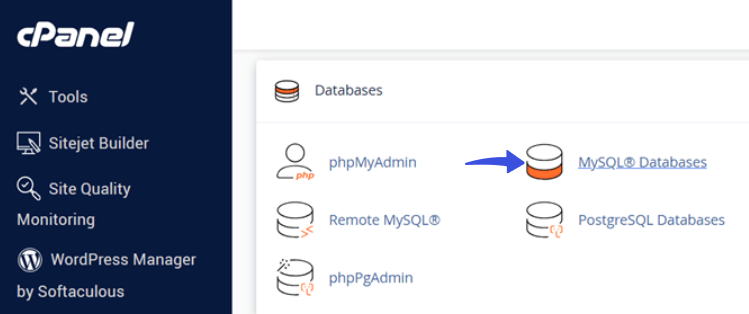
On the next screen, select the MySQL Databases.
Now, type your new Database name.
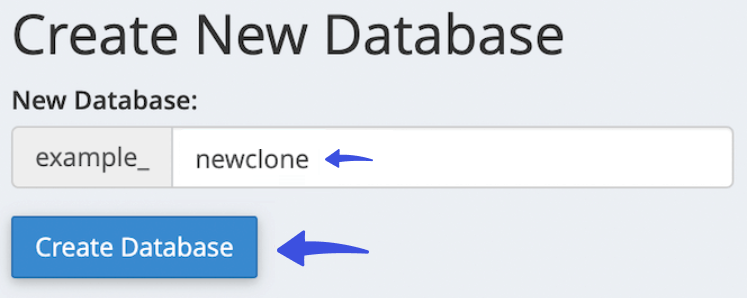
Now, it’s time to add a new user to the MySQL database.
For this purpose, go to the MySQL Users section. Here, provide a username and password and click the Create User button.
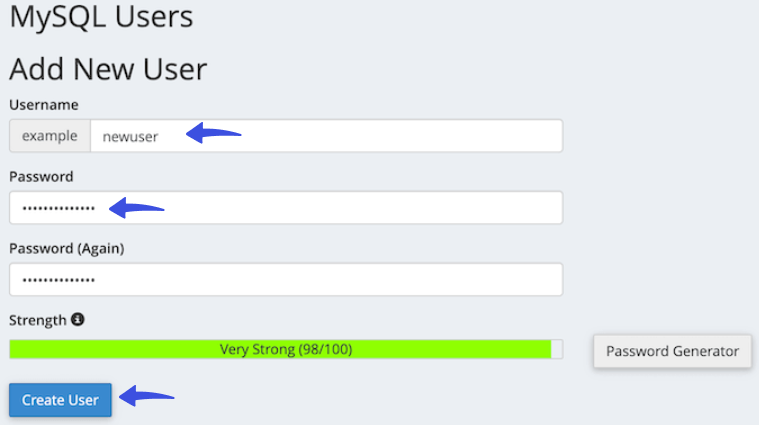
Once the user is created, you need to add the user to the Database.
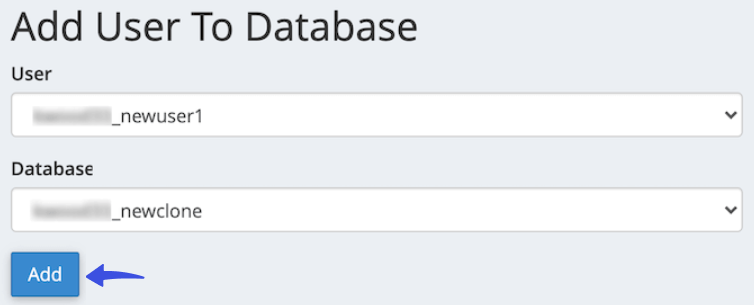
For this purpose, click the Add User to a Database area and click the User dropdown menu. Here, select the user you just created.
Note: Remember the database name, username, and password. You’ll need them for the next step.
When done, click the Add button.
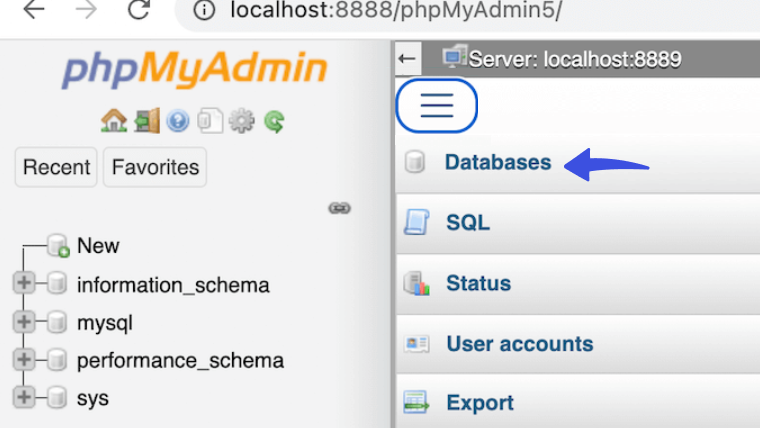
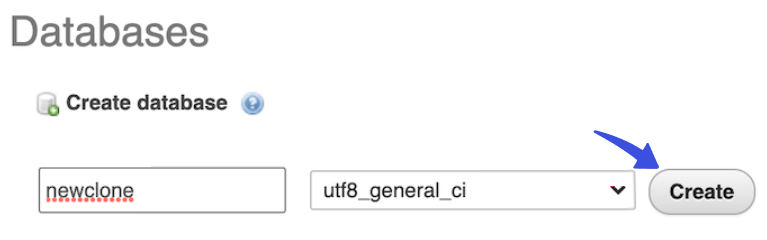
In case you are using a localhost, go to ‘http://localhost/phpmyadmin/’ or ‘http://localhost:8080/phpmyadmin/’.
It will take you to the phpMyAdmin screen. From here, navigate to the Menu and select the Database option.
Next, type in the name of the database. Then, click the Create button.
Step 6. Run the WordPress Site Importer Script
Everything is almost set!
The next step is to install and run the Duplicator installer script. This script will open up the archive file with a few clicks.
To do this, enter https://example.com/installer.php in the web browser.
Note: Don’t forget to replace ‘example.com’ with your domain name.
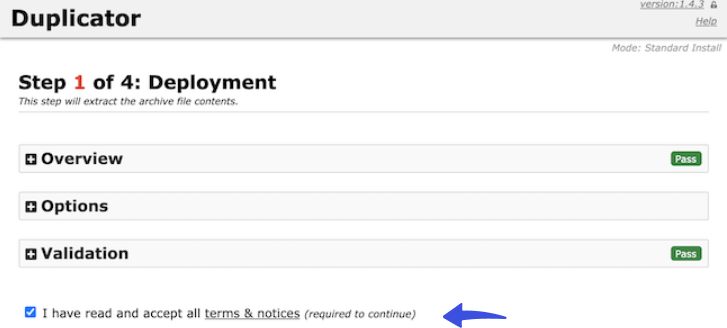
Now, the Duplicator installer script is visible on the screen. First, it checks the backup and initial settings. If there are no errors, check the terms and notices box and click the Next button.
Next, type in your WordPress database information, including:
- Database Name
- User
- Password
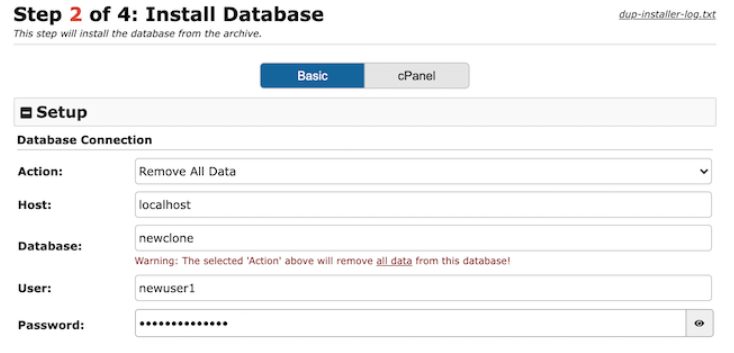
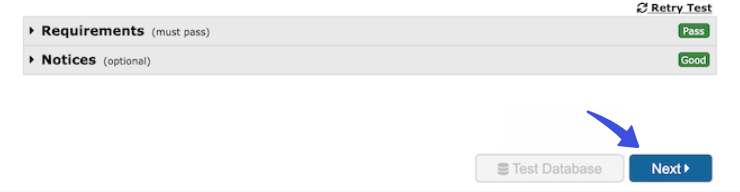
Now, you can click the Test Database button to see if all the information is accurate.
When done, click the Next button.
Next, Duplicator will update and configure files to match your new site’s values, including:
- Title
- URL
- Path
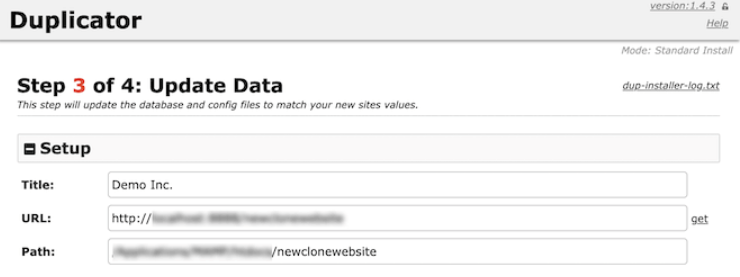
Lastly, click the Admin Login button to finalize your installation.
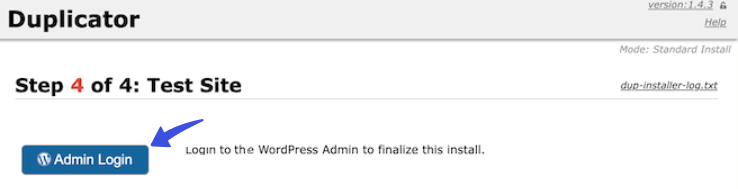
Congratulations, you’ve successfully cloned your site.
How to Clone A WordPress Site Manually
Clone a WordPress site manually in seven steps: connect over FTP, download the root folder, upload it, export the database, set up a new database, import it and update wp-config.php.
Step 1: Connect your Site to a File Transfer Protocol (FTP) Client
You’ll need an FTP client to clone your WordPress site manually.
First off, you’re required to connect your site to a file transfer protocol (FTP) client.
Step 2: Download your Root Directory Folder
After connecting to the FTP client, you have to locate and download your root directory folder.
This folder, usually labeled public_html, holds everything related to your site.
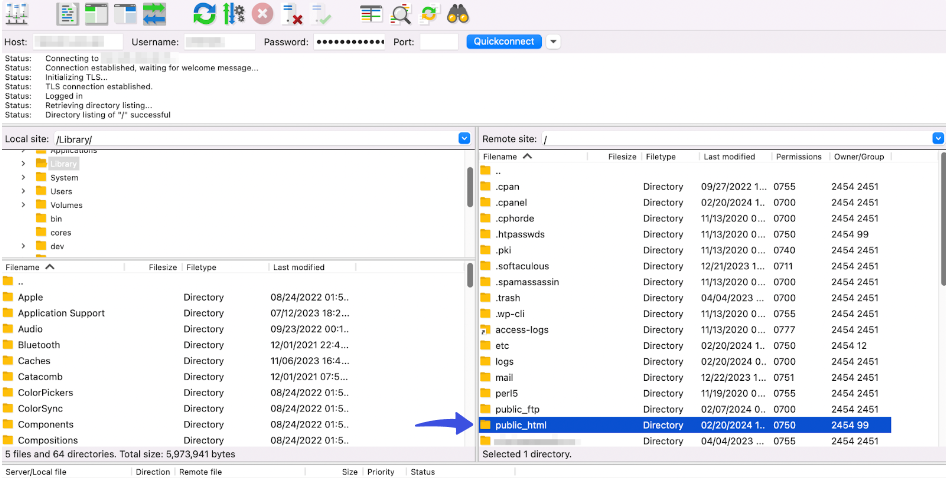
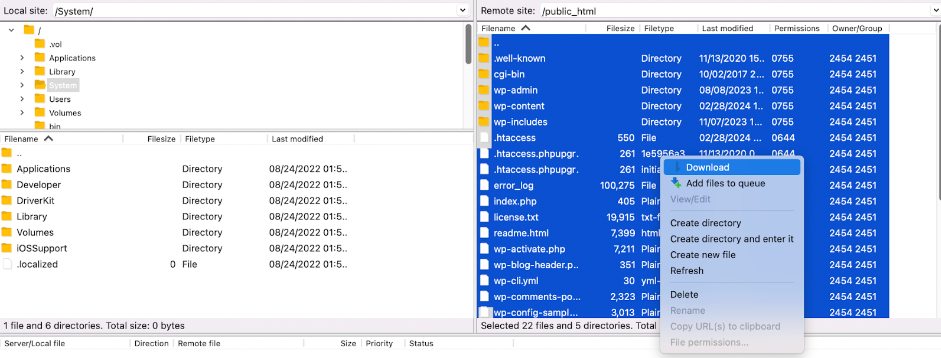
Next, select all the files inside the public_html folder, right-click on them, and click the Download option.
Step 3: Upload Root Directory to the New Server
After downloading a copy of your root directory, connect to your new server.
When done, you need to locate the new site’s root directory. This time, you need to delete all the files inside this folder.
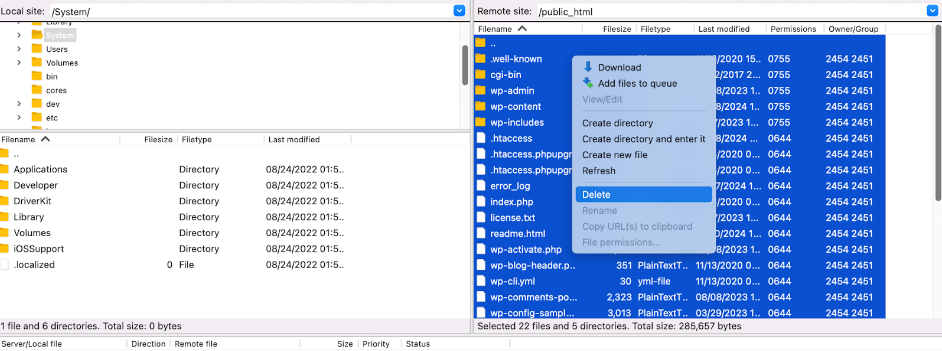
Now, upload the downloaded files into it.
Step 4: Export the Site’s Database
Your root folder doesn’t include the WordPress database, so you need to export your old site’s database.
For this purpose, go to your phpMyAdmin and select the Export tab.
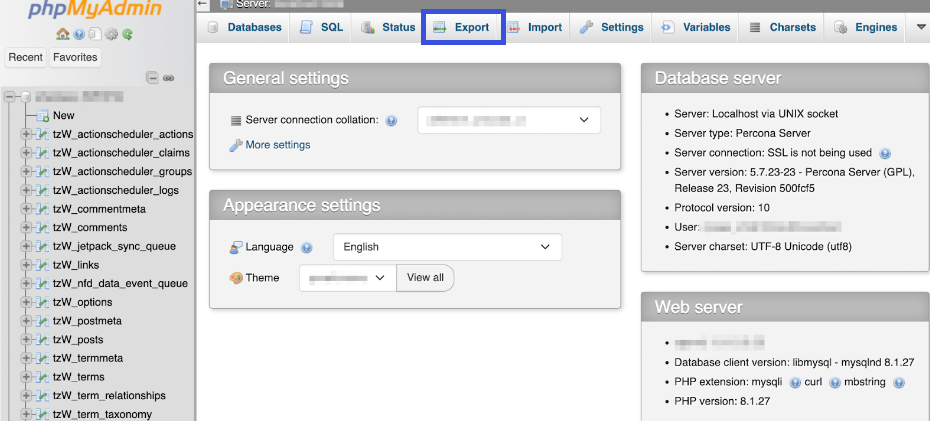
On the next screen, choose your export method, including:
- Quick – displays only the minimal options: It has only the minimal options for cloning.
- Custom – displays all possible options: It ensures the clone site has everything in your database.
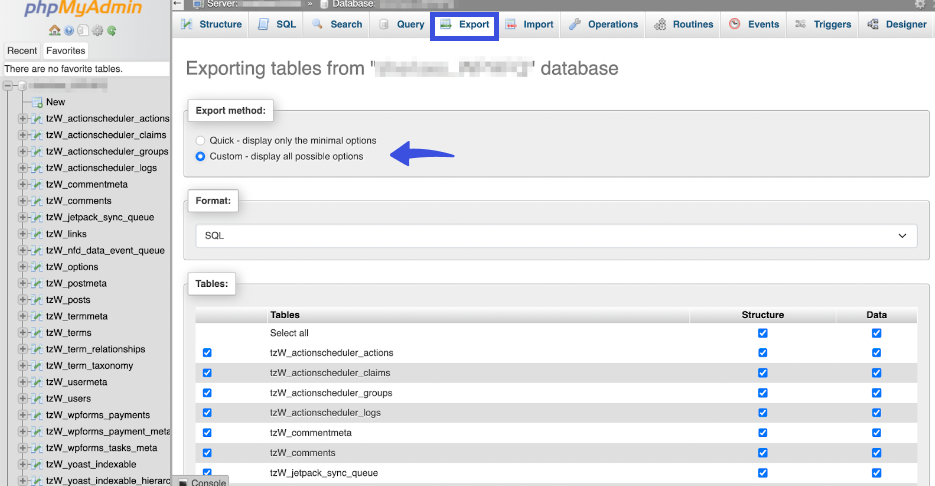
Next, choose SQL format for your database export.
When done, click the Export button.
Step 5: Set Up the Cloned Database
It’s time to set up your database for the cloned site.
For this purpose, log into your hosting account and select your database settings.
This will vary depending on your host. For example, if you’re using Bluehost, go to Advanced, scroll down to the Databases section, and click the Manage button.
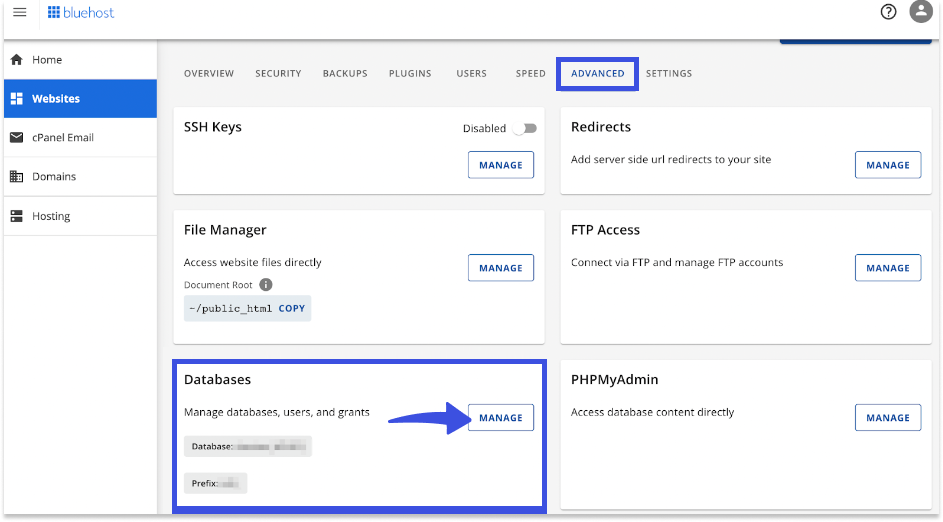
Your control panel screen will open up.
Simply type in the new database name and click the Create Database button.
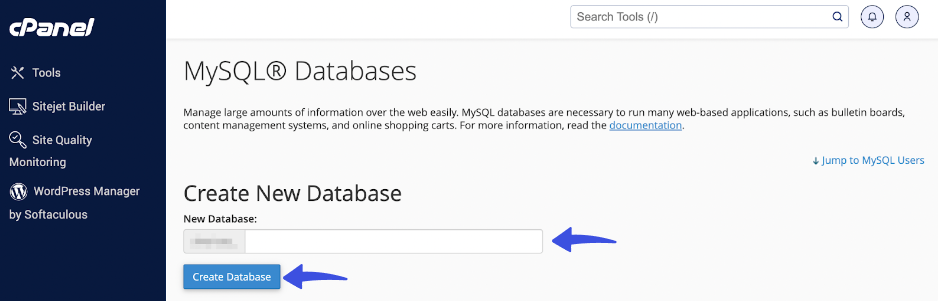
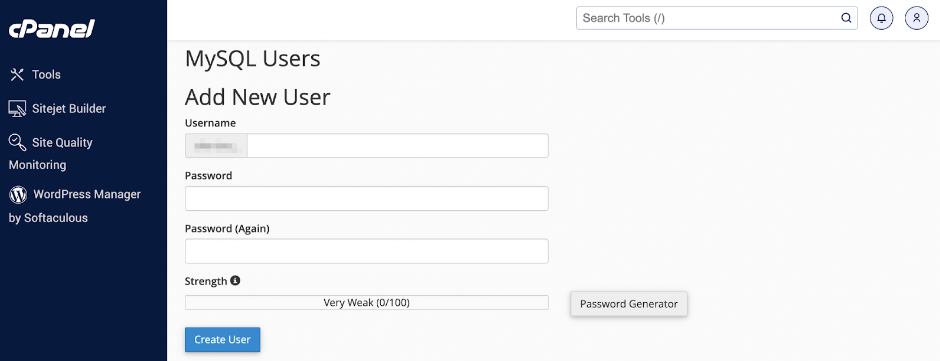
Next, you need to create a new username and password.
When done, click the Create User button.
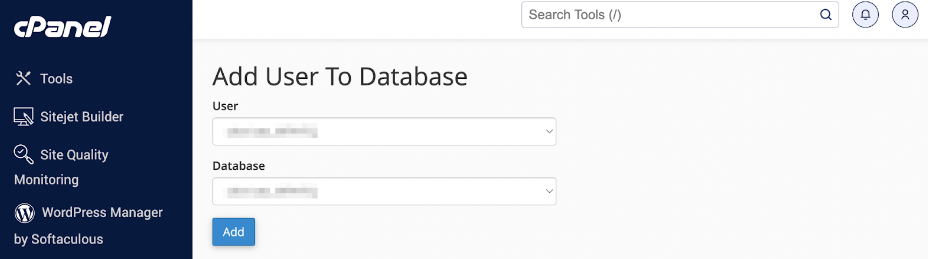
Scroll down a bit and add the new user to the database.
Step 6: Import the Database
Now, you must import your old database into the new one for your cloned WordPress site.
To do this, go to the phpMyAdmin dashboard and select the Import tab at the top of the screen.
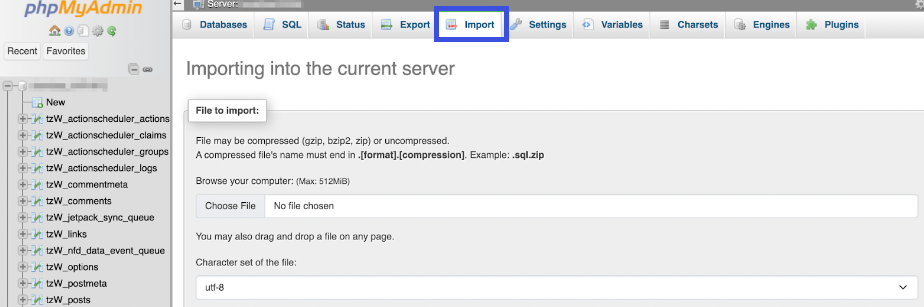
On the next screen, select the exported database file. Leave all the options as they are, select SQL as the format, and click the Import button.
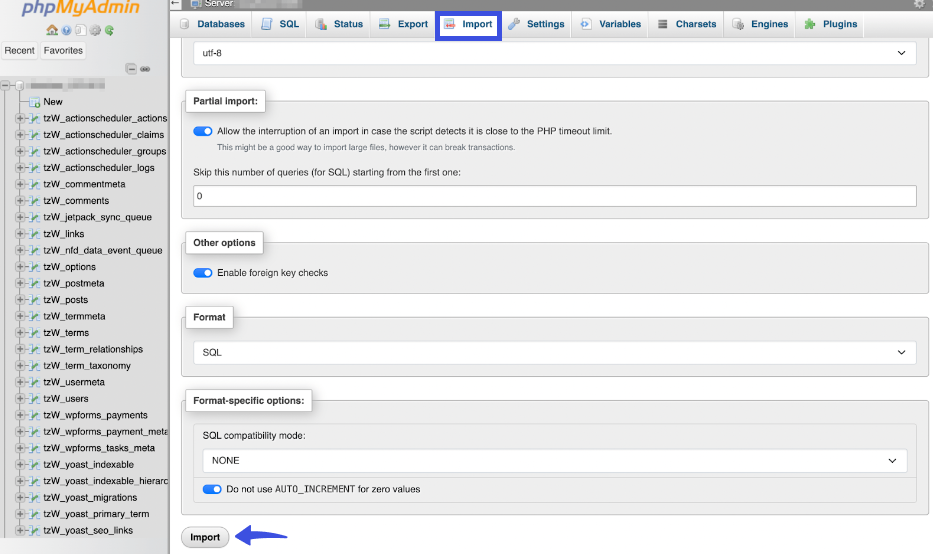
Note: You can stop here if you aren’t moving your domain to a new server. But if you want to move your domain to a new server, follow the last step as well.
Step 7: Update the wp‑config.php File (Optional)
Since you are moving to a new server, you must update your wp-config.php file with the correct database details.
For this purpose, you’re required to access your cloned site’s files via an FTP client.
You’ll find the wp-config.php file inside the public_html root directory.
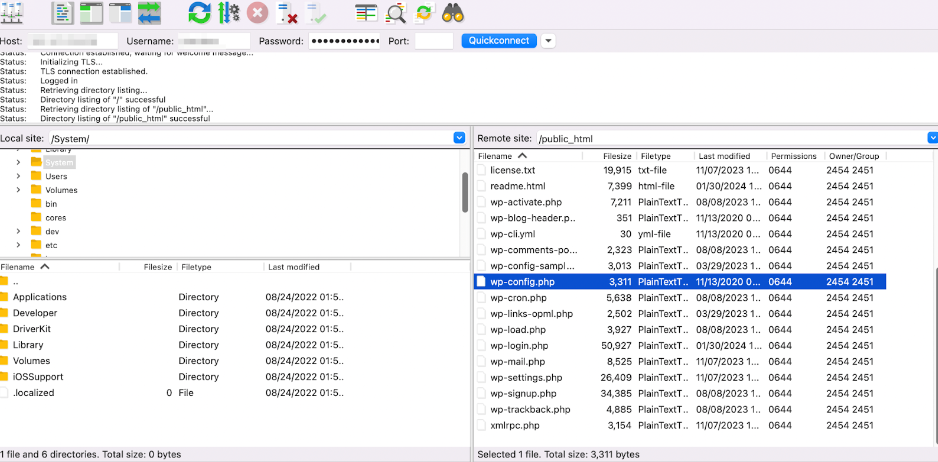
Next, select the wp-config.php file, right-click it, and click the Download option.
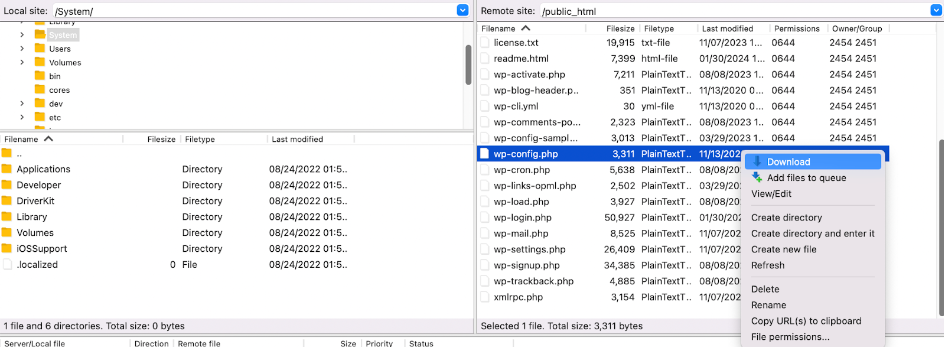
After downloading your file, open your preferred text editor, scroll down, and find the following code snippet:
define('DB_NAME', 'database name');

define('DB_USER', 'username for the database');

define('DB_PASSWORD', 'password for the database');

define('DB_HOST', 'MySQL hostname');
Here, you’ll need to update this information with the newly created credentials.
You can also update your domain name. To do this, find the line saying, “That’s all, stop editing! Happy publishing”, and add this code snippet above it:
define('WP_HOME', 'http://yournewsitedomain.com');

define('WP_SITEURL', 'http://yournewsitedomain.com');
Note: These lines may already exist.
Finally, save the file, re-upload it to your root directory, and replace the old wp-config.php file.
That’s it! This is how you can manually clone a WordPress site.
What’s Next After Cloning Your WordPress Site?
After cloning a WordPress site, check that pages, links and logins work, then protect the copy. Here is what to do next:
- Check that your WordPress site has been cloned correctly.
- Check your cloned WordPress site’s permalink settings.
- You should update your WordPress core, themes, plugins, etc.
- It is better to install must-have WordPress plugins. For example, Analytify will help you keep track of your site’s important stats, like traffic source, bounce rate, conversions, etc. You can also install and activate LoginPress to customize the default WordPress login page and strengthen its security.
- Preview your cloned WordPress site to see if it works correctly.
Which WordPress Cloning Method is Best for You?
A plugin like Duplicator is the best cloning method for most people; the manual method is best for developers who want full control.
If you manually clone your WordPress site, you have complete control over the process, and there is no need for additional plugins or tools. However, it requires technical knowledge, and there is a higher risk of errors.
On the other hand, WordPress cloning plugins make it easy to handle files and databases. They are reliable, which is why they are widely used.
The best method depends on your technical skill level, the size of your site, and the specific requirements of your cloning project.
For beginners, plugins are the easiest option.
WordPress Cloning FAQs
Cloning a WordPress site means creating an exact copy of a site. On the other hand, duplicating a WordPress site means building a new site with data taken from an existing site’s page.
Cloning a WordPress site can be helpful for several reasons. You can use a clone as a staging site for testing, or to move your site to a new host or domain.
You can easily clone a WordPress site using a WordPress plugin, such as Duplicator, or manually clone it using FTP and phpMyAdmin.
Before cloning your site, ensure you have access to FTP and phpMyAdmin. You should also back up your site and database to prevent data loss.
Copied content can hurt your site’s SEO. Search engines may filter out or demote duplicate pages.
Clone a WordPress Site: Final Words
This step-by-step guide covers 2 methods. Choose the method that aligns with your level of expertise.
That’s all for this article!
Here are some other helpful WordPress articles:
Leave a Reply