
To install an SSL certificate in WordPress, get a free Let’s Encrypt or paid certificate from your host, activate it, then force WordPress to load over HTTPS. A WordPress SSL certificate encrypts data passing through your WordPress site and to visitors. This certificate is the reason http:// turns into https://.
In 2026, SSL is non-negotiable. Here are some strong reasons why:
- SEO Boost: Google ranks HTTPS sites higher than HTTP.
- Security: Prevents hacking or man-in-the-middle attacks.
- Trust: Chrome shows “Not Secure” warnings for sites without SSL.
Below, I cover installing an SSL certificate on WordPress and fixing the errors you’re most likely to hit along the way.
WordPress SSL Certificate (TOC):
- What is an SSL Certificate?
- Why You Need an SSL Certificate for WordPress
- Types of SSL Certificates
- How to Install SSL Certificate in WordPress (Step-by-Step Guide)
- LoginPress + SSL Certificate WordPress: The Ultimate WordPress Security Combo
- Troubleshooting Common SSL Issues
- How to Keep Your SSL Certificate Active & Secure
- WordPress SSL Certificate FAQs
- Final Thoughts: WordPress SSL Certificate
Here is how free and paid SSL certificates compare for WordPress.
| Feature | Free SSL (Let’s Encrypt) | Paid SSL (e.g. EV) |
|---|---|---|
| Cost | Free | Paid yearly |
| Encryption | Same strength | Same strength |
| Validation | Domain only | Organization or extended checks |
| Renewal | Automatic through most hosts | Manual or host-managed |
| Best for | Blogs and business sites | Stores and regulated businesses |
What is an SSL Certificate?
An SSL certificate is a digital certificate that encrypts data between your site and visitors, proves your site is genuine, and shows the padlock in browsers.
An SSL (Secure Sockets Layer) certificate is a digital file that:
- Encrypts your site’s data, such as login and payment details.
- Verifies your site’s authenticity and helps to build trust with visitors.
- Activates the padlock icon in browsers to help differentiate between safe and unsafe sites.
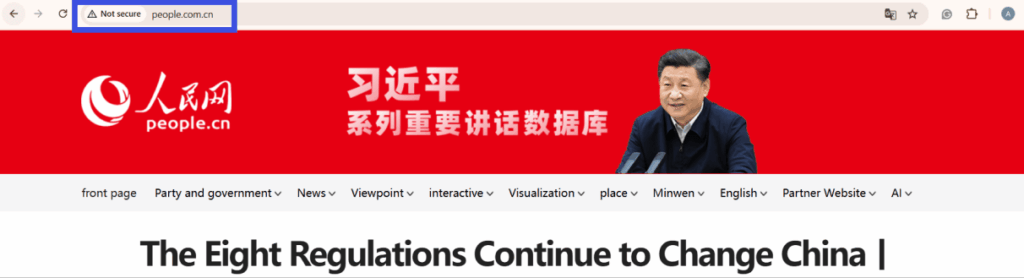
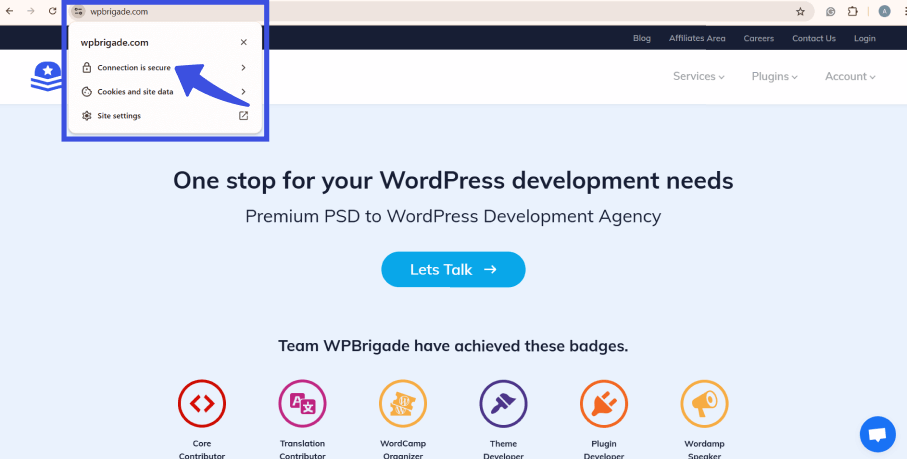
Here’s a quick way to check if a website you’re browsing is secure:
A non-secure website:
A secure website:
Why You Need an SSL Certificate for WordPress
According to a January 2026 report, the number of SSL certificates on the internet surpassed 299 million.
An SSL (Secure Sockets Layer) certificate is no longer optional for your WordPress site; it is a critical requirement for security, SEO, and user trust. Here’s why you should switch to HTTPS if you haven’t yet:
1. Google’s HTTPS Requirement & SEO Impact
Google prioritizes HTTPS sites over HTTP sites because they are more secure.
- Since 2014, Google has prioritized HTTPS as a ranking signal.
- Chrome shows “Not Secure” warnings on HTTP sites, which can hurt site credibility.
- Google’s search engine ranking algorithm favors secure websites.
SEO Benefit: Switching to HTTPS can boost rankings, especially for highly competitive keywords.
2. Security Benefits: Protect Your Site and Users
SSL encrypts all data between your WordPress site and visitors. This helps an SSL-protected site prevent:
- Data Interception (Man-in-the-Middle Attacks): Without SSL, hackers can steal login credentials, credit card details, and personal data.
- Phishing & Fake Login Attacks: SSL verifies your site’s authenticity, preventing fake versions of your site. Brute force attacks on WordPress admin are harder when traffic is encrypted.
- Compliance for Online Payments: Stripe, PayPal, and WooCommerce require SSL for PCI DSS compliance. Without HTTPS, payment gateways may block transactions.
3. User Trust & Higher Conversions
An SSL certificate stops browser “Not Secure” warnings and helps to increase visitor trust in your website. Beyond conversions, SSL delivers financial benefits through advertising. Google Ads prioritizes HTTPS sites with higher Quality Scores. Non-SSL sites can experience higher cost-per-click (CPC) and lower ad visibility.
Key Takeaway:
If your WordPress site doesn’t have SSL in 2026, you’re losing the chance to optimize your site by:
- Losing SEO rankings
- Risking security breaches
- Hurting conversions & trust
Types of SSL Certificates
WordPress site owners can choose a free SSL certificate (Let’s Encrypt, auto-renewing) or a paid certificate such as Extended Validation for eCommerce.
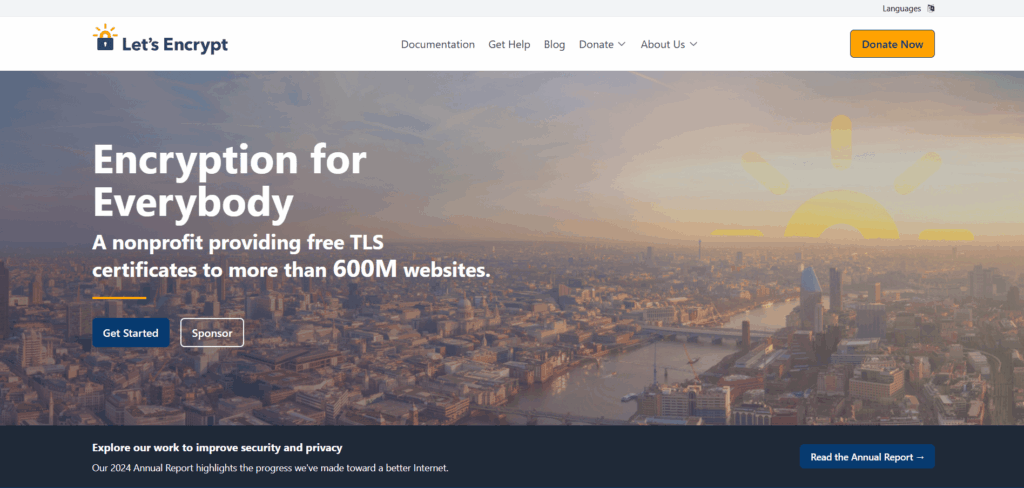
- Free: Free certificates come from Let’s Encrypt and renew automatically.
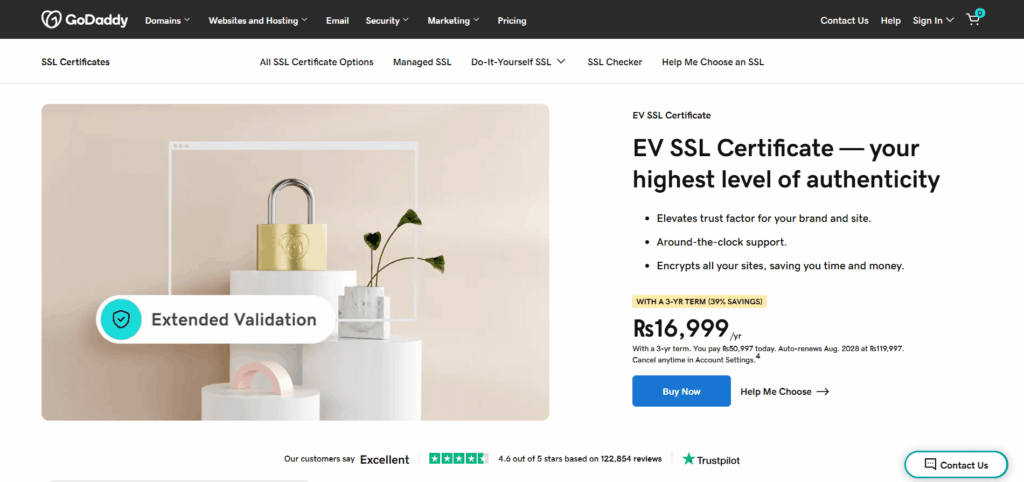
- Paid: Extended Validation (EV) certificates suit eCommerce sites. You can buy one from most reliable hosting services.
How to Install SSL Certificate in WordPress (Step-by-Step Guide)
Install an SSL certificate in WordPress in three steps: check for existing SSL, install the certificate, then force HTTPS.
Step 1: Check if Your Site Already Has SSL
- Visit your site URL.
- Look for a padlock icon in the browser bar or click on the settings icon.
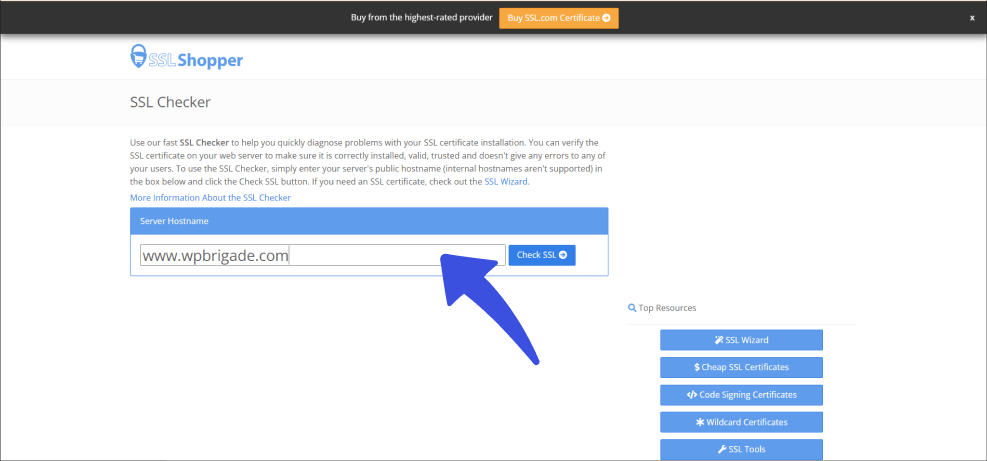
- In addition, you can use SSL Checker to verify.
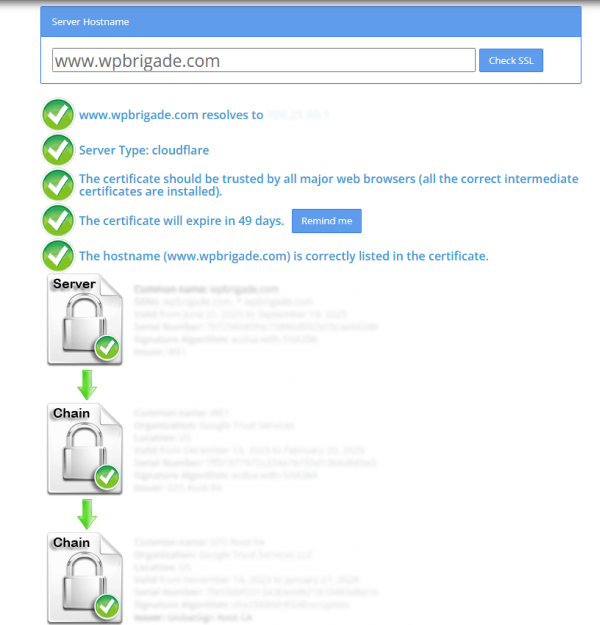
The SSL Checker shows your site’s certificate details:
Step 2: Install SSL Certificate
If your WordPress site has no SSL certificate, don’t worry.
We’ll help you install and configure the SSL certificate on WordPress using easy and quick methods.
Method 1: Via Hosting Provider (Easiest)
This is the easiest way to get an SSL certificate for WordPress. To start with this method:
- First, log in to your hosting dashboard (e.g., Bluehost, SiteGround).
- Next, navigate to the security settings of your hosting plan and select SSL/TLS.
- Select Let’s Encrypt SSL and activate it.
Method 2: Via WordPress Plugin (For Non-Tech Users)
If you want to avoid technical hosting settings, you can use a plugin to set up SSL in WordPress.
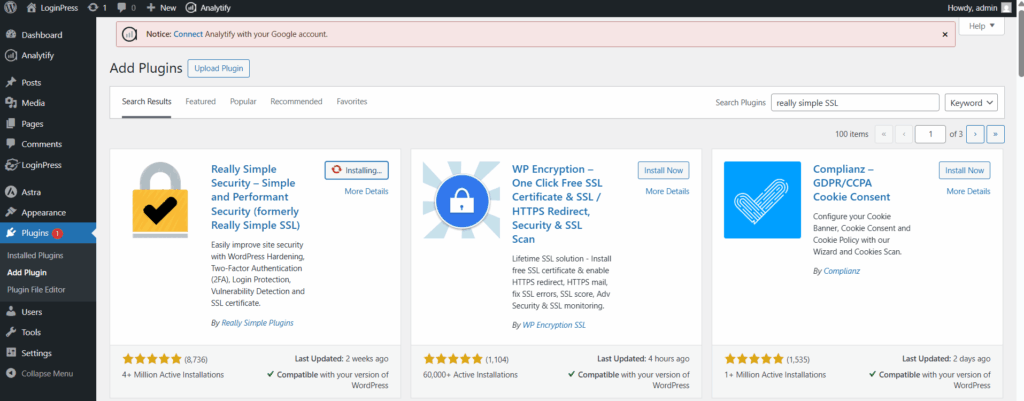
- Install Really Simple SSL or any other plugin of choice.
- After activating the plugin, you will have a dashboard where you can track your SSL status and run tests to check if your WordPress site has an SSL certificate installed.
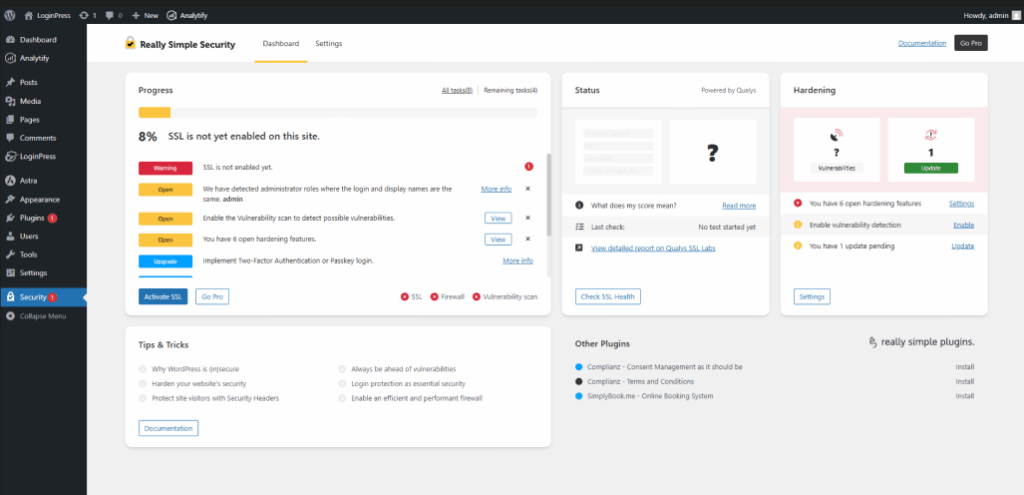
- The plugin will force HTTPS, and its pro features include captcha integration and more.
Method 3: Via Cloudflare (For Advanced Users)
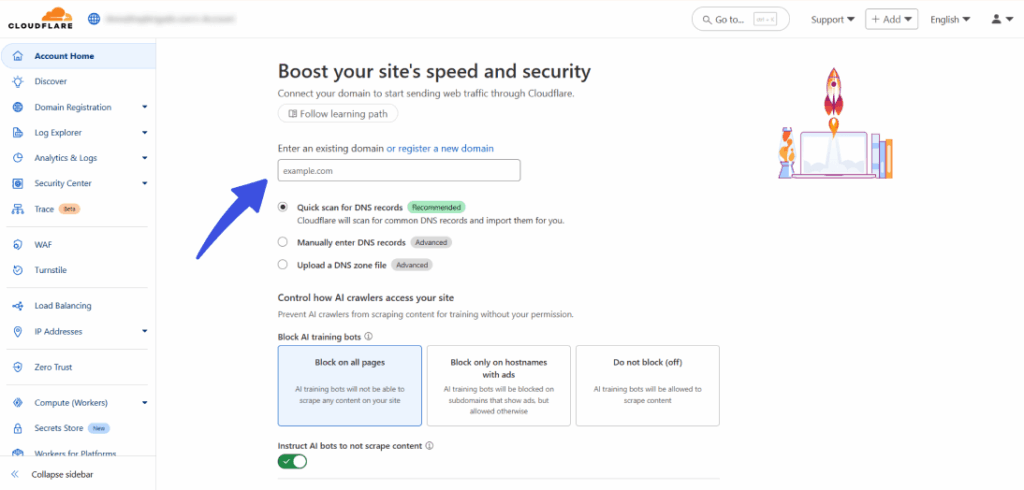
- Sign up for Cloudflare.

- Add your site domain/register for a new domain and change settings as required.
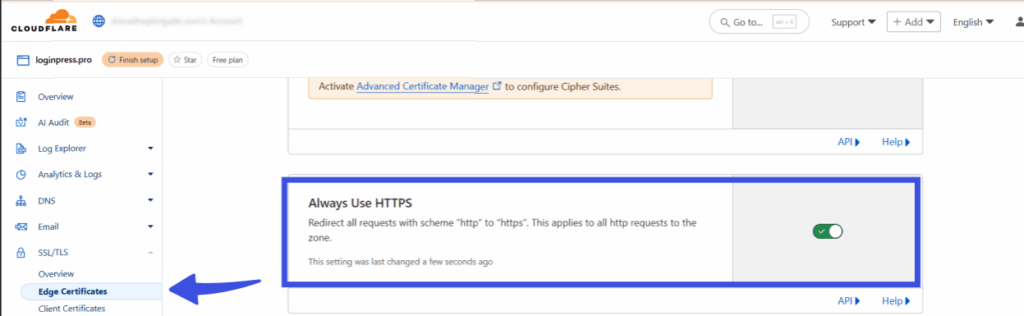
- Navigate to SSL/TLS >> Edge Certificates.
Then you can enable the “Always Use HTTPS” option to ensure your WordPress SSL certificate is on.
Step 3: Force WordPress to Use HTTPS
Use this step if the other methods do not work. It enforces HTTPS using native WordPress settings.
- Update Site URLs:
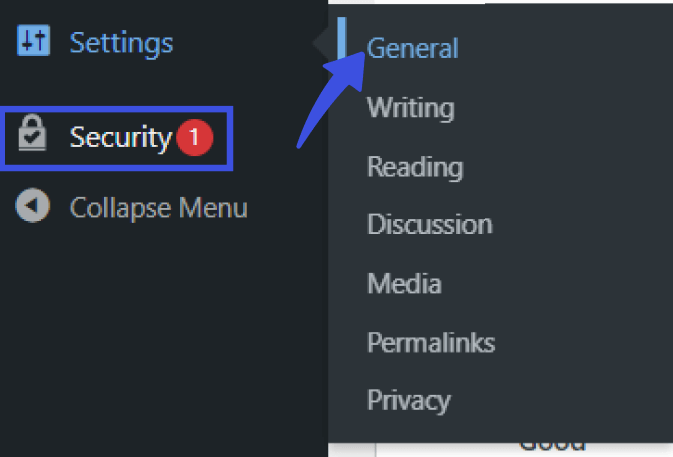
- Go to Settings >> General.
Navigate to your WordPress sidebar menu and select Settings>>General.
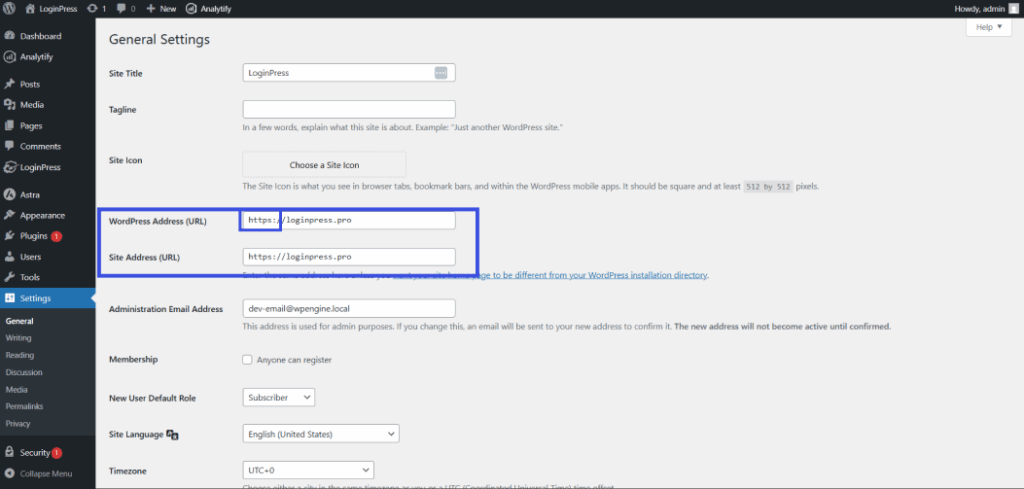
- Change http:// to https:// in the WordPress Address and Site Address fields.
WordPress provides native settings where you can manually change the WordPress Address and Site Address URLs to https.
- Update Database: Run this SQL query via phpMyAdmin (if URLs don’t update):
By updating the database manually, you can enforce HTTPS throughout your WordPress site.
Run this SQL query to force WordPress to use HTTPS:
UPDATE wp_options SET option_value = replace(option_value, ‘http://’, ‘https://’) WHERE option_name = ‘home’ OR option_name = ‘siteurl’;
LoginPress + SSL Certificate WordPress: The Ultimate WordPress Security Combo
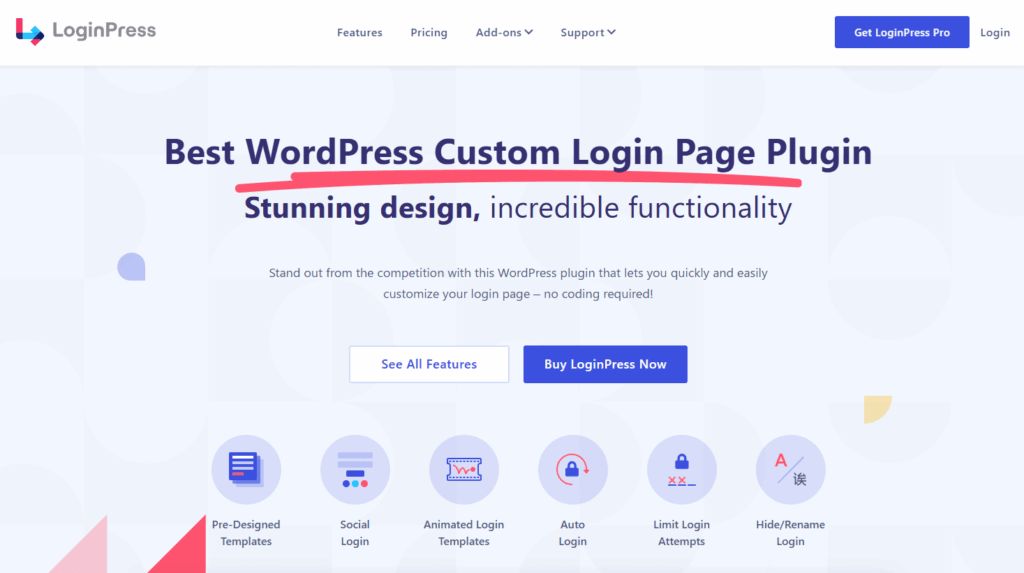
LoginPress adds login page protection on top of SSL, stopping brute-force and bot attacks before they reach your site. While a WordPress SSL certificate provides overall safety from various security breaches, LoginPress helps to fight the attacks before they reach the site.
With 250,000+ installations and thousands of satisfied customers, LoginPress can significantly enhance your site’s security.
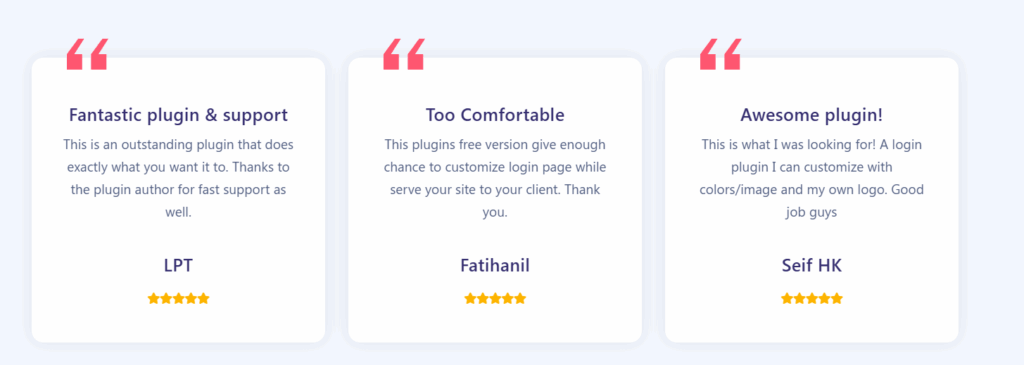
Here’s how LoginPress helps with common login security risks and makes the login page look better:
- Adds Extra Security Layers
A WordPress SSL certificate alone can’t stop constant brute force attacks. This is where LoginPress helps by providing top-notch security features such as:
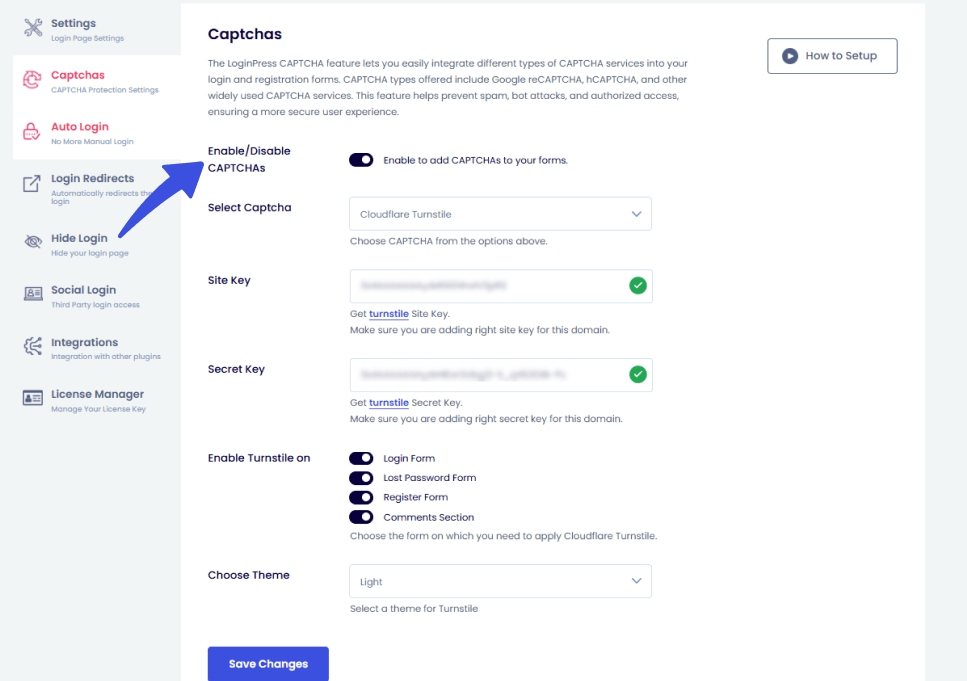
- Enabling reCAPTCHA: This stops bots from spamming login attempts.
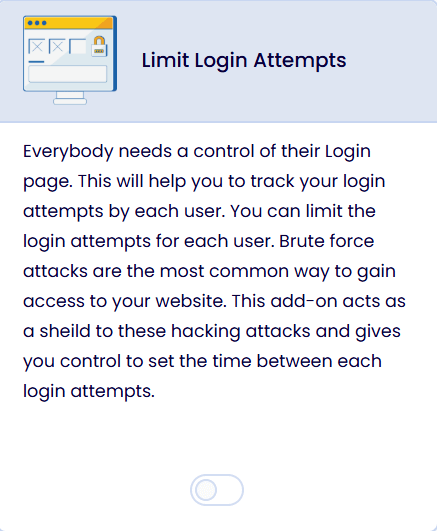
- Login Attempt Limits: This locks out hackers after failed login attempts.
- Custom Login URL: This hides wp-login.php from attackers.
Not only these, LoginPress offers more premium Add-Ons that can support you in
- Customization Without Compromising Security
Many login customizers break SSL by loading external fonts/images.
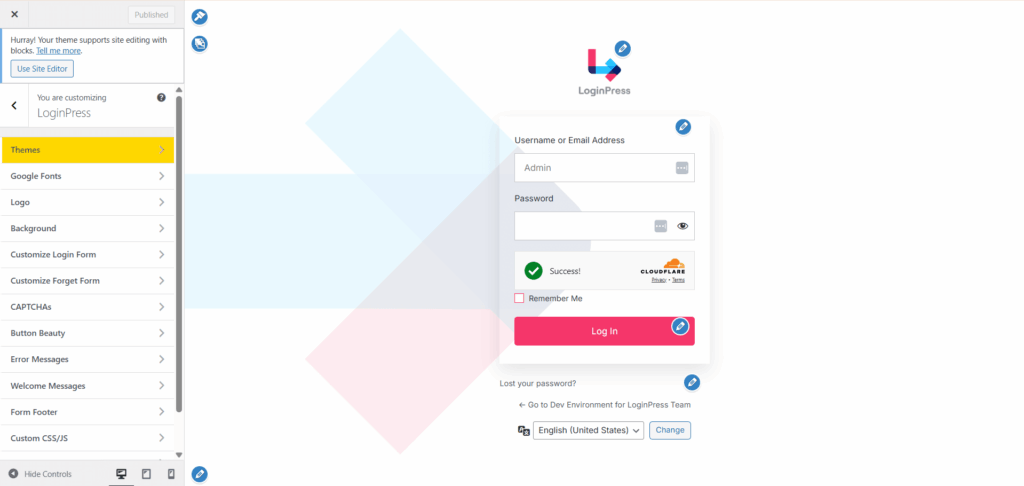
How LoginPress helps:
- All custom logos/fonts load securely
- No mixed content warnings on styled login pages
Tip: Add your company logo without triggering “Not Secure” alerts.
Secure Redirects After Login
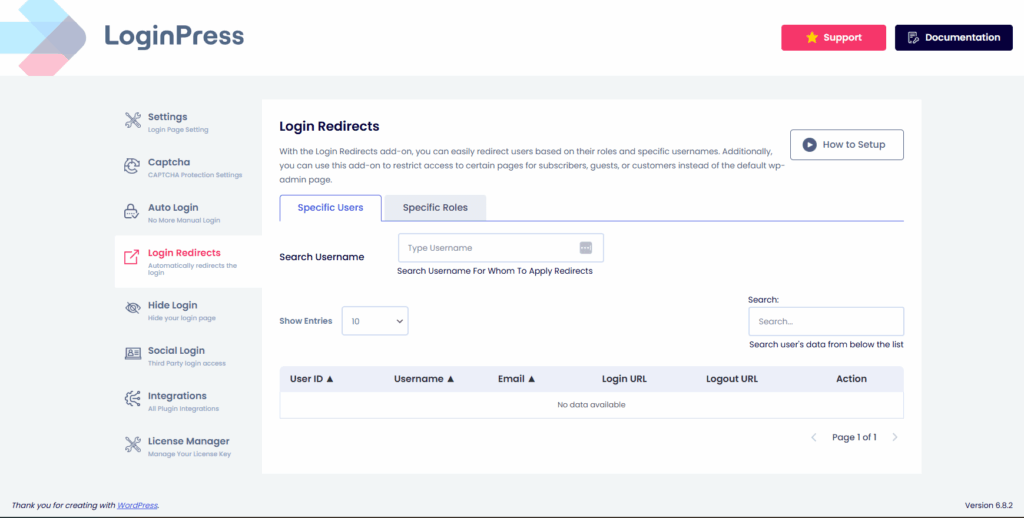
Without a WordPress SSL certificate, redirects after login can be hijacked. With the Login Redirects add-on, you can easily redirect users based on their roles and specific usernames.
How LoginPress helps:
It redirects users securely based on their roles and usernames.
Custom Login Settings
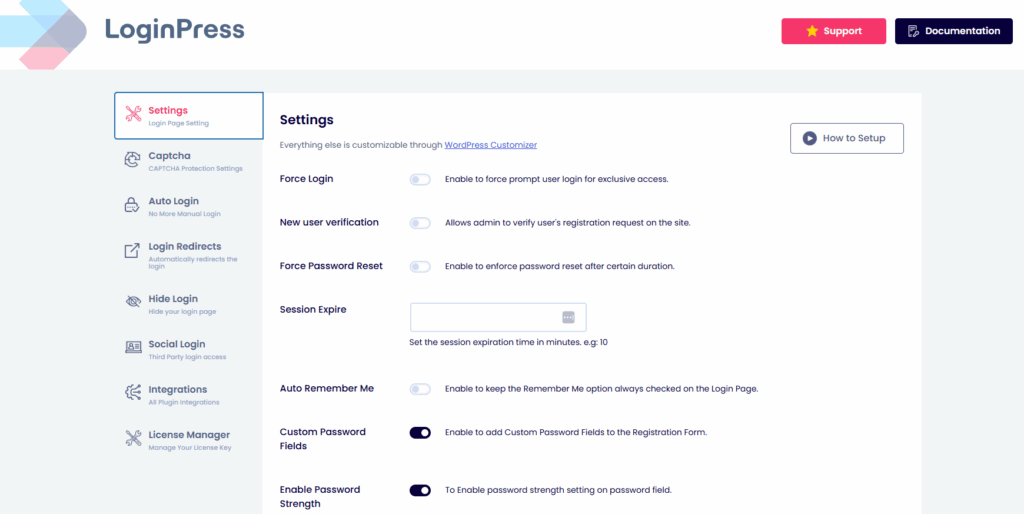
Enabling custom login settings, such as session expiration and forced login, strengthens WordPress security after you install an SSL certificate.
How LoginPress helps:
- Session expiration improves awareness about the logged-in devices.
- Force login requires users to log in before accessing essential parts of the website.
Troubleshooting Common SSL Issues
The most common WordPress SSL problems are mixed content warnings and SSL not working after installation, and both are fixable. Here are detailed solutions for the most common SSL problems you may face:
1. Mixed Content Errors (Broken Padlock Warnings)
Mixed content occurs when your WordPress site loads over HTTPS, yet some resources (images, scripts, stylesheets) are still being loaded via insecure HTTP connections. This triggers browser security warnings and breaks the padlock icon.
How to Fix Mixed Content Errors
You can fix mixed content errors with the following plugin and manual methods.
Plugin Solutions (Recommended for Beginners)
Let’s go through some of the plugins that can troubleshoot the WordPress SSL certificate errors for you:
- Really Simple SSL plugin automatically detects and fixes mixed content issues.
Manual Fixes (For Advanced Users)
Here are some manually performed fixes you can implement as an advanced user:
- Database Search & Replace: Search for: http://yourdomain.com and Replace with: https://yourdomain.com
- Select all tables EXCEPT wp_options
- Debugging with Browser Tools
If you have developer access, open Chrome DevTools >> Console tab, look for “Mixed Content” warnings, and resolve the root causes accordingly.
2. SSL Not Working After Installation
Have you installed an SSL certificate on WordPress, but realize that it is not working?
We’ve got you. Here’s what to do next:
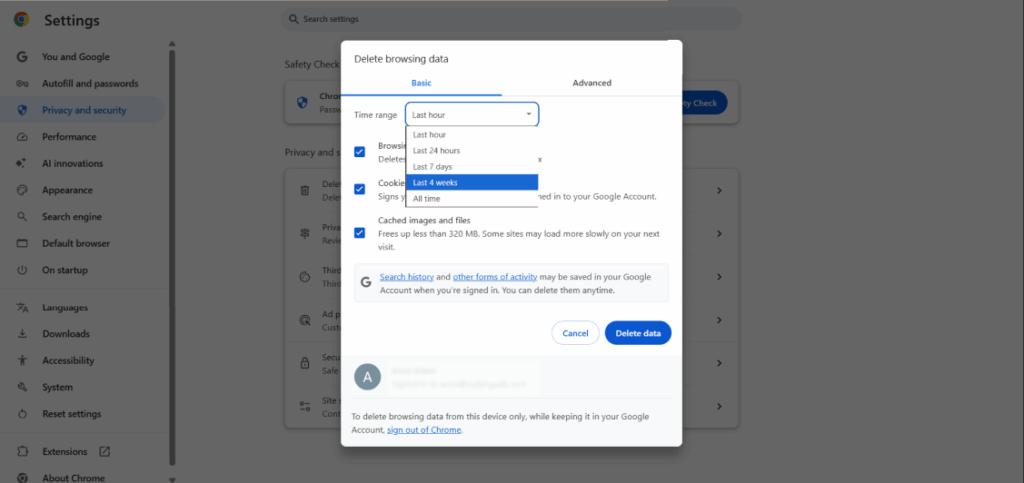
- Clear Browser Cache
- Press Ctrl+Shift+Delete (Windows) or Cmd+Shift+Delete (Mac)
- Select “All time” for the time range
- Check all boxes and click “Clear data.”
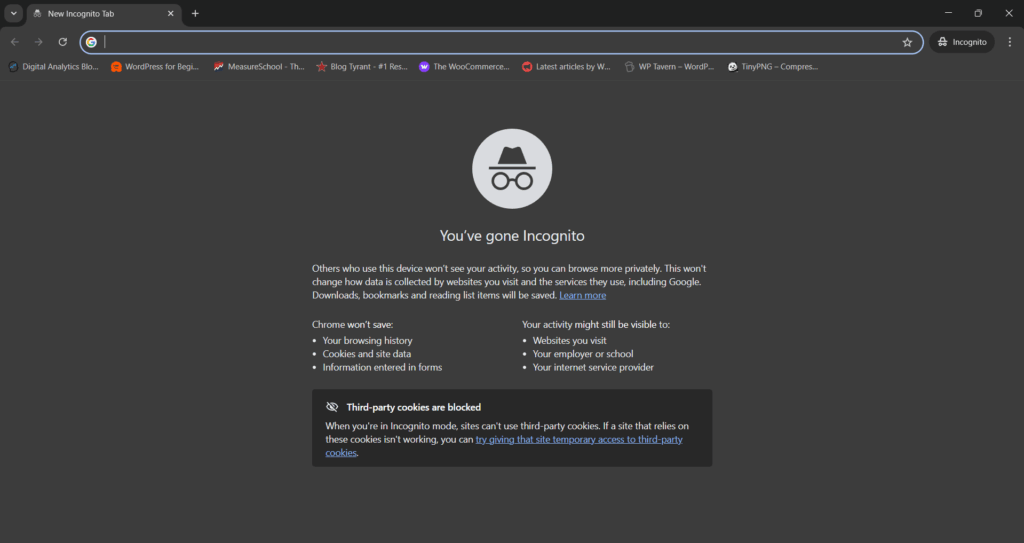
- Test in Incognito Mode
- Opens a clean session without cached data
- Helps determine if the issue is cache-related
Advanced Solutions
If basic troubleshooting doesn’t fix your WordPress SSL certificate, try these advanced solutions:
- Check SSL Certificate Validity using SSL Checker and verify:
- The certificate is installed correctly
- The chain is complete
- No expiration warnings
- For Let’s Encrypt Certificates: Check that auto-renewal is configured.
Cloudflare Specific Issues
For Cloudflare-specific issues, you can try these troubleshooting steps to make sure the SSL on WordPress is working.
- SSL/TLS Settings: Enable “Always Use HTTPS”
- DNS Configuration
- Ensure the orange cloud icon is enabled
- Verify nameservers point to Cloudflare
- Check for outdated DNS records
- Edge Certificates
- Confirm the certificate is active
- Check for any security warnings
By using these troubleshooting steps properly, you can resolve the most common WordPress SSL certificate issues and ensure your website maintains secure HTTPS connections. Also, remember to always back up your site before making significant changes.
How to Keep Your SSL Certificate Active & Secure
Keep your SSL certificate active with auto-renewal, expiry monitoring and regular security checks. This matters more in 2026: since 15 March 2026, public SSL certificates can be valid for a maximum of 200 days, so manual renewals come around more often.
1. Enable Auto-Renewal (Critical for Free SSL Certificates)
Free SSL certificates (like Let’s Encrypt) expire every 90 days. Auto-renewal prevents unexpected website downtime due to WordPress SSL expiration.
How to Set Up
Here are some simple ways to set up auto-renewal options on your SSL WordPress certificate:
- Enable “Auto-Renew SSL” in the hosting dashboard.
- Activate “Universal SSL” in SSL/TLS settings.
Pro Tip: Some hosts disable auto-renewal by default, so always verify in your control panel.
2. Monitor Certificate Expiry
An expired SSL breaks HTTPS security, which can hurt SEO and user trust.
Best Monitoring Practices
These monitoring practices help you catch SSL certificate problems early:
- Use free tools like UptimeRobot (alerts 7+ days before expiry)
- Set Google Calendar reminders for manual checks
- For Linux servers, you can check expiry by running the command:
openssl x509 -enddate -noout -in /etc/ssl/your_certificate.crt
3. Regularly Check for Security Vulnerabilities
Outdated SSL protocols can easily expose sites to cyber attacks. Check your WordPress SSL setup every month with this checklist:
Monthly Security Checklist (Advanced Level):
- Test SSL configuration at SSL Labs.
- Disable weak protocols (TLS 1.0/1.1) in hosting settings
- Update cipher suites to prioritize strong options, such as AES-256 encryption or ECDHE key exchange.
- Add security headers in .htaccess:
Header set Strict-Transport-Security “max-age=31536000; includeSubDomains; preload”
WordPress SSL Certificate FAQs
If your SSL isn’t working post-installation, follow this troubleshooting checklist:
Clear browser cache (Ctrl+Shift+Delete) and test in incognito mode
Verify certificate installation using SSL Shopper’s SSL Checker
Check server configuration to ensure HTTPS is enforced.
Confirm your hosting provider installed the certificate correctly
Mixed content occurs when your HTTPS site loads HTTP resources (images, scripts). Fix it by:
Plugin Method: Install Really Simple SSL (auto-fixes 95% of mixed content)
Manual Method:
Update hardcoded HTTP links in: Theme files like header.php and footer.php
Database content (use Better Search Replace plugin)
Add this to the wp-config file:
define(‘FORCE_SSL_ADMIN’, true);
Most SSL certificates activate instantly or within minutes after installation. However:
Free SSLs (Let’s Encrypt): Immediate activation
Paid SSLs: May take 1-24 hours for full activation
Browser caching: Some visitors might still see “Not Secure” for up to 48 hours
Quick check: Use SSL Labs’ SSL Test to verify activation status.
This usually happens when:
Some pages still load over HTTP
Fix: Update all internal links to HTTPS (use the “Better Search Replace” plugin)
Your SSL certificate expired
Fix: Renew it (most hosts auto-renew Let’s Encrypt certificates)
Browser is loading cached HTTP version
Fix: Clear cache or test in a new incognito window
Final Thoughts: WordPress SSL Certificate
Keeping your SSL certificate secure requires just three key habits: auto-renewal, expiry monitoring, and regular security checks.
This post provided you with step-by-step instructions to ensure you successfully install and renew your WordPress SSL certificate and keep your site secure from hackers and other attacks.
For more WordPress troubleshooting guides, try these:
- How to Access WordPress Admin with a Fatal Error Warning
- How to Find and Access WordPress Error Logs
Do you want to explore more WordPress security tips? Let us know in the comments, and don’t forget to check our other guides on WordPress!
Leave a Reply