
UCMM lets you control when maintenance mode appears for specific pages and posts on your site. You no longer have to put your entire website under construction at once.
With the latest settings, you can configure global maintenance behavior, assign maintenance mode to specific pages or posts, and quickly check which parts of your site are affected. This gives you fine-grained control over what your visitors see during updates, migrations, or partial redesigns.
Prerequisites #
Before you begin, make sure the following are in place:
- The UCMM plugin is installed and activated on your WordPress site.
- You are running UCMM 3.0 or later, so you can access the latest Settings and page-level controls.
How Do You Access the UCMM Settings? #
To open the settings area where all maintenance controls live, follow these steps:
- Log in to your WordPress dashboard.
- Navigate to Under Construction / Maintenance Mode (UCMM), then Settings.
- The UCMM Settings page opens.
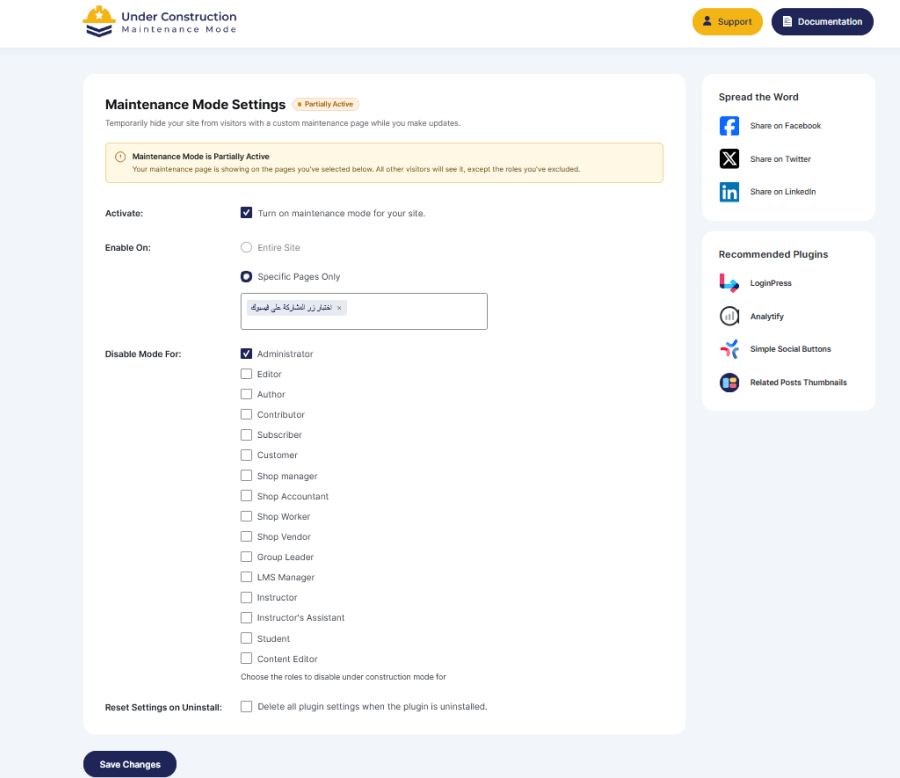
Inside the Settings page, you will find several distinct areas:
| Area | What it does |
| Settings | Controls the overall maintenance mode configuration for your site. |
| Page rules/assignments | Lets you include or exclude specific pages and posts. |
| Role controls | Disables maintenance mode for specific user roles. |
| Reset Settings | Restores the plugin to its default configuration. |
How Do You Keep Specific Pages Live?
Use this option when most of your site should be under maintenance, but certain key pages must stay public. A landing page, a pricing page, or a legal page is a common example.
Follow these steps to exclude pages from maintenance mode:
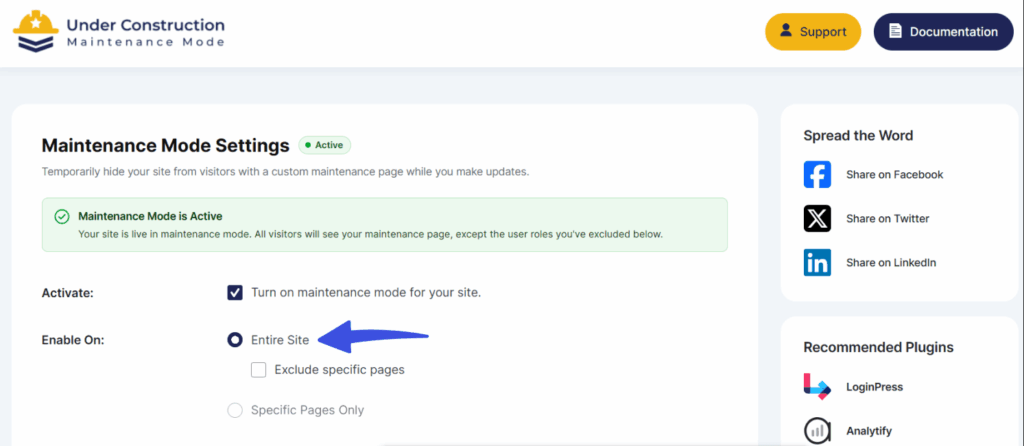
- In the UCMM settings section, choose Enable On Entire site.
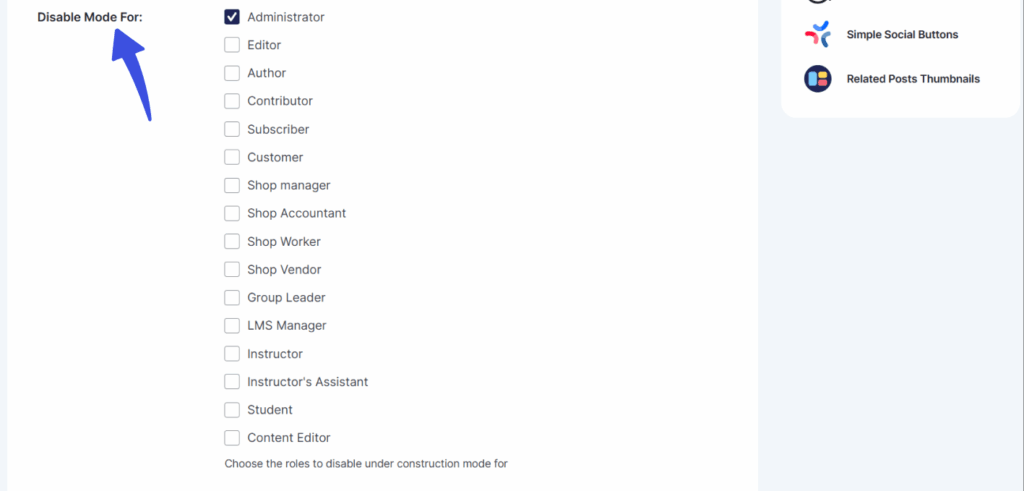
- Check the option Disable Mode For so those roles can access the site while everything else is under maintenance.
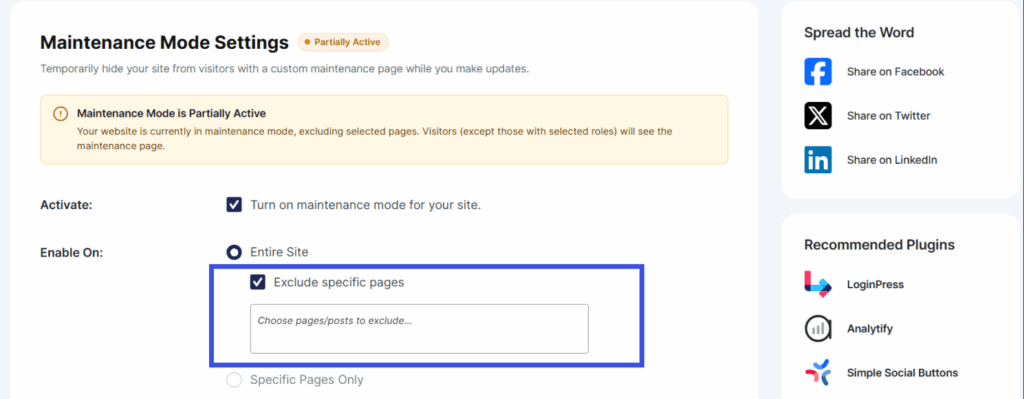
- To add the pages you want to keep live, check the Exclude Specific Pages option and add in the URLs that need to stay active. For example: “Home”, “Landing Page”, or “Contact”.
- Click Save Changes.
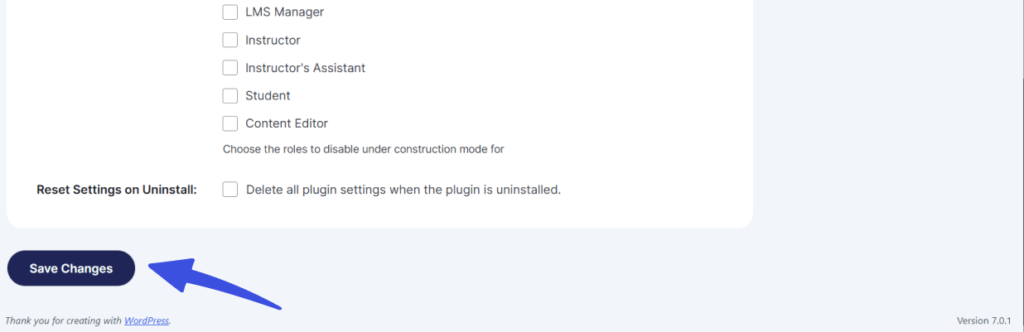
Visitors will now see the maintenance page on every page except the ones you excluded.
How Do You Enable Maintenance Mode for Specific Pages Only? #
Use this option when you want maintenance mode to show only on certain URLs. A new section you are still building is a good example, while the rest of your site stays live.
Follow these steps to limit maintenance mode to selected pages:
- In the UCMM settings, select the option Enable on Specific Pages to limit maintenance mode to specific pages.
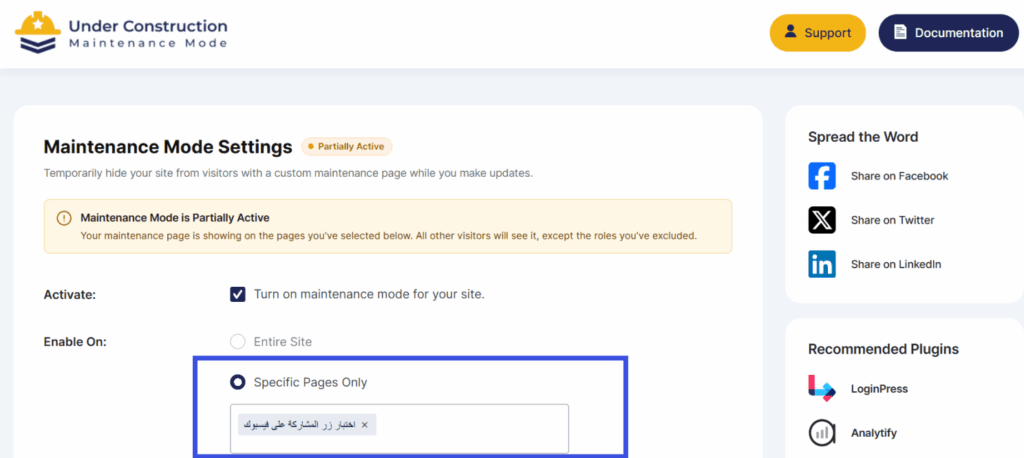
- Use the page/post selector to search and add the pages or posts where you want maintenance mode to apply. For example: “Blog”, “Pricing”, or any custom landing page.
- Click Save Changes.
Once saved, UCMM shows the maintenance page only on the selected pages or posts. All other pages remain accessible to visitors.
Common Use Cases #
These settings support several practical workflows:
- Keep a landing page live while you work on the rest of the site, so you can continue running campaigns or collecting leads.
- Hide in-progress sections, such as a new blog or features page, without affecting the rest of your website.
- Switch quickly between whole-site maintenance and selected-pages-only mode using the same Settings, depending on your release or migration plan.
Tips for Testing Your Setup #
A few checks help confirm your configuration works as expected:
- Open an incognito or private window and visit your site as a logged-out user. This confirms which pages are in maintenance mode and which remain live.
- If you use caching or security plugins, clear the cache. This ensures your latest UCMM settings and page rules are applied.
Need Help? #
If you run into any issues setting up page-level maintenance mode, our support team is here to help. Visit the UCMM contact page or check our documentation for additional guidance.
Additional UCMM Configuration Resources #
To further customize your maintenance screen, manage SEO impacts during site updates, or review plugin telemetry settings, explore the following documentation guides:
- SEO Configuration Options: Learn how to manage search engine indexing, meta tags, and site visibility settings while running maintenance mode.
- How to Customize the Text Section: Step-by-step instructions for editing headlines, body copy, and messaging displayed on your maintenance screen.
- Non-Sensitive Diagnostic Tracking: Details on how usage data and diagnostic telemetry are collected to improve plugin stability and performance.